How can we help?
Enter whatever you're curious about and we'll give you a smart summary of the best answers as well as relevant articles.
Enter whatever you're curious about and we'll give you a smart summary of the best answers as well as relevant articles.

Lorem ipsum dolor sit amet, consectetur adipiscing elit. Ut et massa mi.

Lorem ipsum dolor sit amet, consectetur adipiscing elit. Ut et massa mi.

Lorem ipsum dolor sit amet, consectetur adipiscing elit. Ut et massa mi.

The bulk product management system is currently facilitated by spreadsheet uploads. These spreadsheets need to be in the most basic spreadsheet format, CSV (comma separated values), which is a data file type that any spreadsheet program can open. Because of its simple data format, you cannot have special formatting, such as formatted text (bold, italic, bullet points, etc.) or macros in the saved files. For more information on how to work with spreadsheets in our system, please click here . It is strongly recommended that you read the linked article before you start working with this part of the system, due to the technical nature of this kind of work.
Steps for Adding Products in Bulk
Please Note: It is a good idea to keep your uploads to 3,000 line items or less. The system may time out if you upload more than that at once.
The system allows you to create a variety of form fields for a product that will let your customer give you preferences or information about the product. For example, if you sell a bag with embroidered initials, you could create a form to allow the customer to enter the initials they want. You can add single line input, paragraph input, check-box, and drop-list fields to your product, and the system will email you the information entered into the forms.
Here is a short video showing you how you can create product forms in the Product Page 3.0:
There are several places in the system you can create products. One of the most frequently used is when you click the + Button in the upper left and click Product in the pop-out list.
Another frequently-used area is under Inventory > Products > New Product.
Another area worthy of mention here is the + button in the Register, next to the item search area.
You can also create products from within Work Orders, Purchase Orders & Receiving Orders, and from the Categories page under Products, when viewing a category or subcategory.
Finally, you can create products in bulk with basic data in the Inventory > Bulk area using the Add New Products spreadsheet. For full details, click here: Add Products in Bulk by Spreadsheet
If you need the ability to 'disassemble' kits and put the component inventory back into the individual components, you can do that from within the Edit Product page.
Please Note: This tool does NOT reverse inventory adjusted by the Precuts tool, it applies only to kits.
To Disassemble Kits you have already built using the Assemble Kits feature, do the following:
1. Go to Inventory > Products and search for the kit you want to Disassemble.
2. Click on the Kit product title to open its detailed Edit Product view.
3. Click on the Inventory tab on the left.

4. Scroll down to the Current Inventory area and click the Edit button on the right.

5. Find the inventory line-item with active inventory and click the Disassemble link on the far right.

6. In the Disassemble Kit window, select the number of kits you will be disassembling, the Restock Quantity will update to show how much of each component item will be going back into those products.

7. Click the Disassemble Kit button to make the inventory changes. The inventory quantity of the Kit itself will be reduced, and each component will be increased according to the numbers you entered.
If you need the ability to 'disassemble' kits and put the component inventory back into the individual components, you can do that from within the Edit Product page.
Please Note: This tool does NOT reverse inventory adjusted by the Precuts tool, it applies only to kits.
To Disassemble Kits you have already built using the Assemble Kits feature, do the following:
1. Go to Inventory > Products and search for the kit you want to Disassemble.
2. Click on the Kit product title to open its detailed Edit Product view.
3. Click on the Inventory tab on the left.
4. Scroll down to the Current Inventory area and click the Edit button on the right.
5. Find the inventory line-item with active inventory and click the Disassemble link on the far right.
6. In the Disassemble Kit window, select the number of kits you will be disassembling, the Restock Quantity will update to show how much of each component item will be going back into those products.
7. Click the Disassemble Kit button to make the inventory changes. The inventory quantity of the Kit itself will be reduced, and each component will be increased according to the numbers you entered.
We do not have a way to set a specific amount to charge for shipping per product, but you can have the product's weight determine how much is charged. Start by looking at your shipping settings. After logging into , in the upper right click on the Admin Button with your username and go to Settings > Website Settings > Shipping, and click to Configure your shipping methods. Check the box for the method you want to work with and click to Edit, or if you don't yet have a shipping method, click the green +Add Domestic Shipping Method button to create a new one. After you set the Region, currency, method name, and delivery time, in the 'Based On' area, you will need to select Weight. Each of your products can be set to have whatever weight it might need in order to charge enough shipping to cover the item. If you don't have weight values in place for your products, you will need to enter them, and they go in as decimal values of pounds (or kilograms, if that is the system you use), so an item that weighs 24-ounces will go in as 1.5 in the weight field for the product. Be sure to click Save at the bottom after you're finished adjusting your rates.
We do not have a way to set a specific amount to charge for shipping per product, but you can have the product's weight determine how much is charged. Start by looking at your shipping settings. After logging into , in the upper right click on the Admin Button with your username and go to Settings > Website Settings > Shipping, and click to Configure your shipping methods. Check the box for the method you want to work with and click to Edit, or if you don't yet have a shipping method, click the green +Add Domestic Shipping Method button to create a new one. After you set the Region, currency, method name, and delivery time, in the 'Based On' area, you will need to select Weight. Each of your products can be set to have whatever weight it might need in order to charge enough shipping to cover the item. If you don't have weight values in place for your products, you will need to enter them, and they go in as decimal values of pounds (or kilograms, if that is the system you use), so an item that weighs 24-ounces will go in as 1.5 in the weight field for the product. Be sure to click Save at the bottom after you're finished adjusting your rates.
We do not have a way to set a specific amount to charge for shipping per product, but you can have the product's weight determine how much is charged. Start by looking at your shipping settings. After logging into , in the upper right click on the Admin Button with your username and go to Settings > Website Settings > Shipping, and click to Configure your shipping methods. Check the box for the method you want to work with and click to Edit, or if you don't yet have a shipping method, click the green +Add Domestic Shipping Method button to create a new one. After you set the Region, currency, method name, and delivery time, in the 'Based On' area, you will need to select Weight. Each of your products can be set to have whatever weight it might need in order to charge enough shipping to cover the item. If you don't have weight values in place for your products, you will need to enter them, and they go in as decimal values of pounds (or kilograms, if that is the system you use), so an item that weighs 24-ounces will go in as 1.5 in the weight field for the product. Be sure to click Save at the bottom after you're finished adjusting your rates.
We do not have a way to set a specific amount to charge for shipping per product, but you can have the product's weight determine how much is charged. Start by looking at your shipping settings. After logging into , in the upper right click on the Admin Button with your username and go to Settings > Website Settings > Shipping, and click to Configure your shipping methods. Check the box for the method you want to work with and click to Edit, or if you don't yet have a shipping method, click the green +Add Domestic Shipping Method button to create a new one. After you set the Region, currency, method name, and delivery time, in the 'Based On' area, you will need to select Weight. Each of your products can be set to have whatever weight it might need in order to charge enough shipping to cover the item. If you don't have weight values in place for your products, you will need to enter them, and they go in as decimal values of pounds (or kilograms, if that is the system you use), so an item that weighs 24-ounces will go in as 1.5 in the weight field for the product. Be sure to click Save at the bottom after you're finished adjusting your rates.
If you do wholesale pricing or other special pricing for your Members and you do not yet see a place in your products to add Wholesale Price, please call us at 385-404-6200 and use option 2 for Support and we can activate that for you if you have our Website Plus or greater service package. For more information on how to set up for Wholesale Pricing and membership, please click here: Website Administration - Members.
If you do wholesale pricing or other special pricing for your Members and you do not yet see a place in your products to add Wholesale Price, please call us at 385-404-6200 and use option 2 for Support and we can activate that for you if you have our Website Plus or greater service package. For more information on how to set up for Wholesale Pricing and membership, please click here: Website Administration - Members.
If you do wholesale pricing or other special pricing for your Members and you do not yet see a place in your products to add Wholesale Price, please call us at 385-404-6200 and use option 2 for Support and we can activate that for you if you have our Website Plus or greater service package. For more information on how to set up for Wholesale Pricing and membership, please click here: Website Administration - Members.
If you do wholesale pricing or other special pricing for your Members and you do not yet see a place in your products to add Wholesale Price, please call us at 385-404-6200 and use option 2 for Support and we can activate that for you if you have our Website Plus or greater service package. For more information on how to set up for Wholesale Pricing and membership, please click here: Website Administration - Members.
Images are a crucial part of any website's success, so you need to make sure you are working with them in the best possible ways throughout the site. To start, let's go over some simple rules you'll want to follow.
Start Large - As a general rule, you will want images that are large for your website, at least to start. You can always size them down to whatever you need, so starting with a larger image is good, think 800px - 1000px (see size guidelines below).
Use JPEGs, PNGs, or SVGs - Other formats may not work at all (e.g. GIFs). If you are not familiar with PNGs, they are an Adobe image format for the web that allows for image transparency. SVGs are a vector image format (line art instead of pixel art) that scale beautifully larger or smaller as needed. For pixel-based images (JPEGs and PNGs), our system has an auto scaling feature that always rescales the image file for optimal image quality.
Resize with Care - Sizing down is always fine; just realize you will lose detail the smaller the image gets, and that's normal. Never enlarge an image past its starting size, or it will begin to pixelate and look grainy.
Know Your Limits - For web images, the largest you would ever need them to be is about 2,000px wide, so the system may block you from uploading images larger than this. Similarly, you don't what huge image file sizes for web images or it will slow your page load time way down, so the limit on the file size is 4mb. Anything larger will be blocked from upload. If for some reason you need to upload an image that exceeds these limits, click on the Documents folder in the Files area and you can upload files up to 100mb in size. For display on the web page, though, you will want to follow the limits above.
Crop for Best Fit - To maintain an orderly appearance, or to make sure that your images line up nicely, you will want to crop them to exact dimensions. If you're replacing an image, find its original dimensions and crop the new image to fit. In your slideshow, you will want all images to have exactly the same dimensions, whatever you feel looks best.
If you need to add an image into a module to display on one of your pages or if you need to change out an old image for a new one, please follow the steps below:
In addition to the rules above, you will want to follow these guidelines when working with images in the different areas of the system:
Product Images: You will want these to be large, if you can get them that way. Anywhere from 800px to 1000px is preferred, with a minimum of 500px wide. The system will downsize them as needed wherever they display smaller. Uploading smaller images can work, but it won't represent the product well, and can jeopardize the customer's perception of the product value as well as their online shopping experience. Taking your own photos with a digital camera or smartphone is good if the product manufacturer doesn't have good ones available.
Category Images: Smaller is okay, around 400px is about as large as they will ever be seen.
Class Images: Again, larger is better. If you can follow the same guidelines for product images, that is great. Not as critical as your product images, but still quite important because in many ways, the image you put up for a class will be helping you sell it.
Slideshow: If you are using the Responsive website system (all newer sites do) your slideshow either spans the full width of the browser, or the width of the central content area. We recommend uploading images at 1920px wide for full-width, and 1170 wide for standard width. For the height, the only important consideration is that the images you put in all have the same pixel height.
Free Online Resources: When working with images, especially ones you take with a camera with a high megapixel count (3MP or higher), you often will need to down-size the image to get it to upload in the first place. For many areas of the system, such as your slideshow, you will also need to crop images to specific pixel dimensions. Here are some great free resources to help you with your image work:
Pixlr.com by Autodesk: This is an online image editing program that is free for you to use, with a paid version that has more robust features. With Pixlr Express you get AI enhanced editing and will easily be able to do simple functions such as resizing, cropping, and even adding text overlays.
Canva.com is a phenomenal resource and tool set for doing web graphics, promotional images, or any image and text layout work you might have on your list.
WebFX Colorpicker: Need an RGB value or a Hex code for a specific color? This easy to use site will let you get what you need quickly.
IconFinder: Many free icons, buttons, and symbols for whatever you might need for your site.
Pexels.com: Free stock images, all royalty free!
Adobe Color: Need to find matching colors? Or perhaps a palette of compatible colors for use on your site? Adobe has put together an amazing tool you can try for free to help you intuitively find the colors you want.
You can set a product to ignore actual inventory levels and sell as if you have unlimited inventory on your website. We strongly recommend doing this only for products you can make yourself or that you can reorder very quickly so that your customers don't have to wait too long for their orders.
Once you are logged into the system, click on Inventory > Products and search for the product you want. Click on its title to open it, then find the Unlimited Web Inventory setting and set it to Yes, then scroll to the bottom of the screen and click Save.
That product will now be available to order online even if you go into negative actual inventory, so you should only do this with products you are sure you can 'turn around' quickly for order fulfillment. If all of your products are safe to set that way, there is an option in your system settings to make new products default to Unlimited Inventory.
On the far right side of the blue bar, click on the Admin Button in the upper right and go to Settings > Website Settings > Products, and about half way down the list of options, you'll see Default Unlimited Web Inventory. Set it to Yes, then scroll to the bottom of the page and click Save. All new products you create will automatically be set to have that 'On' moving forward.
If you wish for your customers to just have a Notes field available on every product where they can enter general notes for you, follow these instructions:
Once you have logged into , in the upper right, click on the Admin Button with your username. In the drop-list, go to Settings > Website Settings > Products, you will see a setting for Notes Field a short way down the list. Change the setting to On and then scroll to the bottom of the page and click Save. Each of your products will now have a Notes field with no limit to the amount of text they might want to include for you.
You will receive those notes in the notification email you receive for the order, and they will also be visible when you open the transaction under Orders.
If you wish to create specific types of form fields for a specific product, follow these instructions:
Once you have logged into , click Inventory > Products, search for the product you want and click on its Title. On the left, click on the Website Settings Tab, scroll down and you will see Product Form area. You can add a Single Line Input, Paragraph Input, a Check Box for yes or no answers, or a Dropdown Box to let the customer choose one option from a list. Once you've created whatever fields you need, be sure to click Save at the bottom.
On its web page, the product will now display the form fields you created. You will receive the form submissions in the notification email you receive for the order, and they will also be visible when you open the transaction under Orders.
We have the ability in the system to enable you to set item conditions for products you sell that have serial numbers as well as for your standard inventory.
To enable this feature, once you are logged into the system click on the Admin Button with your username in the upper right and go to Settings > Website Settings > Products, and you'll see an option for Item Condition about half way down the list. Set it to On, set the Default Condition that new products will start with, and then scroll to the bottom of the page and click Save. Now in each of your products, you will have a drop-list on the product's Details tab below the Price areas where you can set the item's condition. If you make changes to that field, be sure to scroll to the bottom and click to Save the product.
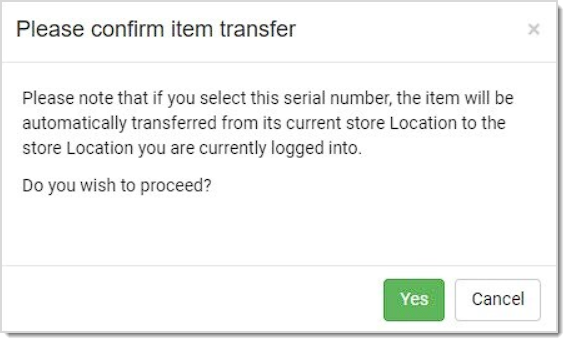
To enable this feature, once you are logged into the system click on the Admin Button with your username in the upper right and go to Settings > POS Settings > Products, and you'll see an option for Item Condition. Set it to ON, choose the different conditions you wish to use, and then scroll to the bottom of the page and click Save. Now in each of your serialized products, when you click the Change link for the Inventory area on the product's Details tab you will have a drop-list next to each serial number so you can set Condition Levels uniquely for each item.
Similarly, instead of the normal Price fields, you will have a Manage link next to Pricing that will give you a table for different prices for the different Item Conditions, and if you do Rent to Own, you will have a tab for your Rental Pricing by Item Condition level. If you make changes to that field, be sure to scroll to the bottom and click to Save the product.
You can find comprehensive information about how to set up and work with Item Conditions for standard and for serialized inventory by clicking here: Product Condition Levels.
We have the ability in the system to enable you to set item conditions for products you sell that have serial numbers as well as for your standard inventory.
To enable this feature, once you are logged into the system click on the Admin Button with your username in the upper right and go to Settings > Website Settings > Products, and you'll see an option for Item Condition about half way down the list. Set it to On, set the Default Condition that new products will start with, and then scroll to the bottom of the page and click Save. Now in each of your products, you will have a drop-list on the product's Details tab below the Price areas where you can set the item's condition. If you make changes to that field, be sure to scroll to the bottom and click to Save the product.
To enable this feature, once you are logged into the system click on the Admin Button with your username in the upper right and go to Settings > POS Settings > Products, and you'll see an option for Item Condition. Set it to ON, choose the different conditions you wish to use, and then scroll to the bottom of the page and click Save. Now in each of your serialized products, when you click the Change link for the Inventory area on the product's Details tab you will have a drop-list next to each serial number so you can set Condition Levels uniquely for each item.
Similarly, instead of the normal Price fields, you will have a Manage link next to Pricing that will give you a table for different prices for the different Item Conditions, and if you do Rent to Own, you will have a tab for your Rental Pricing by Item Condition level. If you make changes to that field, be sure to scroll to the bottom and click to Save the product.
You can find comprehensive information about how to set up and work with Item Conditions for standard and for serialized inventory by clicking here: Product Condition Levels.
To configure the settings for the printer itself, open Chrome and enter the following:
http://localhost:631/printers/
If you get the screen below, you need to enable CUPS for your OS. If not, skip down below to the Localhost Configuration section:
To enable CUPS for your computer, first highlight and copy: cupsctl WebInterface=yes
Next, click the magnifying glass Search icon in the upper right and enter Terminal, then click to run the application.
After Terminal opens, you will see a cursor flashing: paste what you copied and click Return to run the setting.
You can close Terminal after it completes the setting. You will now be able to access your printer configuration from the localhost.
You will see a list of all active printers once the localhost opens. Click on the Printer and a page will load showing the printer attributes.
Find the drop list pictured below and click on Set Default Options.
Select Custom Size from the Media Size drop list and enter either 1 x 1 in inches for the 30332 labels, 2.125 x 1.125 in inches for the 30334 labels, 2 x .75 inches for the 30330 labels, 2 x 0.5 in inches for the 1 up labels, or 3.5 x 0.5 in inches for the Rat Tail/Long Tail Labels.
Darkness: 15
Print Rate: 5 in/sec
Label Top: 0
Print Mode: Tear-off
Tear-off Adjust Position: 0
Reprint After Error: Never
Once CUPS is taken care of, on select a label to print. Then in Chrome, click on the More Settings and click on the Print Using System Dialog options.
Once in the screen click on the View Details options (If you cannot see more information).
Open up the terminal window and enter the following command:
defaults write com.google.Chrome DisablePrintPreview -bool true
(Note: Found this is the best option to print)
Open up the terminal window and enter the following command:
defaults write com.google.Chrome DisablePrintPreview -bool false
If Disabled, To print correctly use the print using System Dialog Option at the bottom of Print Preview.
Configurations for the supported label types:
1 x1 (30332) labels (Chrome Print: Paper Size - 1 x 1.50 (30347) with margins set to minimum and a scale of 93%)
Paper Size: 1 in width and 1 in heightMargins: all 0Portrait 2.25 x 1.25 (30334) labels (Chrome Print: Paper Size - 2.25 x 1.25 with margins set to default)
Paper size: 2.25 in width and 1.25 in heightMargins: all 0Portrait2.25 x 0.75 (30330) labels (Chrome Print: Paper Size - 2.25 x 0.75 with margins set to minimum with a scale of 93%)
Paper size: 2.25 in width and 0.83 in heightMargin: 0Scale: 95%Landscape Dumbbell 2up Dymo (Jewelry Labels) (Chrome Print: Paper Size - 2 x 0.5 with margins set to default, This may skip labels)
Paper size: 2.12 in width and 0.83 in heightMargin: all 0Scale: 95%Portrait Dumbbell 1up Dymo (Jewelry Labels)
Paper size: 2 in width and 0.5 in heightMargin: all 0PortraitLong Tail
Paper size: 3.5 in width and 0.5 in heightMargin: all 0PortraitTo configure the settings for the printer itself, open Chrome and enter the following:
http://localhost:631/printers/
If you get the screen below, you need to enable CUPS for your OS. If not, skip down below to the Localhost Configuration section:
To enable CUPS for your computer, first highlight and copy: cupsctl WebInterface=yes
Next, click the magnifying glass Search icon in the upper right and enter Terminal, then click to run the application.
After Terminal opens, you will see a cursor flashing: paste what you copied and click Return to run the setting.
You can close Terminal after it completes the setting. You will now be able to access your printer configuration from the localhost.
You will see a list of all active printers once the localhost opens. Click on the Printer and a page will load showing the printer attributes.
Find the drop list pictured below and click on Set Default Options.
Select Custom Size from the Media Size drop list and enter either 1 x 1 in inches for the 30332 labels, 2.125 x 1.125 in inches for the 30334 labels, 2 x .75 inches for the 30330 labels, 2 x 0.5 in inches for the 1 up labels, or 3.5 x 0.5 in inches for the Rat Tail/Long Tail Labels.
Darkness: 15
Print Rate: 5 in/sec
Label Top: 0
Print Mode: Tear-off
Tear-off Adjust Position: 0
Reprint After Error: Never
Once CUPS is taken care of, on select a label to print. Then in Chrome, click on the More Settings and click on the Print Using System Dialog options.
Once in the screen click on the View Details options (If you cannot see more information).
Open up the terminal window and enter the following command:
defaults write com.google.Chrome DisablePrintPreview -bool true
(Note: Found this is the best option to print)
Open up the terminal window and enter the following command:
defaults write com.google.Chrome DisablePrintPreview -bool false
If Disabled, To print correctly use the print using System Dialog Option at the bottom of Print Preview.
Configurations for the supported label types:
1 x1 (30332) labels (Chrome Print: Paper Size - 1 x 1.50 (30347) with margins set to minimum and a scale of 93%)
Paper Size: 1 in width and 1 in heightMargins: all 0Portrait 2.25 x 1.25 (30334) labels (Chrome Print: Paper Size - 2.25 x 1.25 with margins set to default)
Paper size: 2.25 in width and 1.25 in heightMargins: all 0Portrait2.25 x 0.75 (30330) labels (Chrome Print: Paper Size - 2.25 x 0.75 with margins set to minimum with a scale of 93%)
Paper size: 2.25 in width and 0.83 in heightMargin: 0Scale: 95%Landscape Dumbbell 2up Dymo (Jewelry Labels) (Chrome Print: Paper Size - 2 x 0.5 with margins set to default, This may skip labels)
Paper size: 2.12 in width and 0.83 in heightMargin: all 0Scale: 95%Portrait Dumbbell 1up Dymo (Jewelry Labels)
Paper size: 2 in width and 0.5 in heightMargin: all 0PortraitLong Tail
Paper size: 3.5 in width and 0.5 in heightMargin: all 0PortraitYou can get to this part of the system by logging into the system and then on the left, click Inventory > Products. You can also merge products in your Purchase Orders, which you create by going to +Create New > New Purchase Order.
You can merge similar or duplicated products in your main Products page as well as in your Purchase Orders. Duplicate products are often the result of accidentally creating a new product in a Purchase Order because you might not have realized it was already saved in your system.
You can merge any two products together with this function, but at present, it does not yet work with product Variants / Options.
From your Products page, you can search for any product that might be duplicated, and on the right, click on the line-item actions button (three vertical dots), and you'll see the option to Merge Products.
If you create a new Purchase Order and add items to it, each will have the same line-item action button as in the Products page. For each, if you know there is a duplicate product you need to merge, you can click to Merge Products.
To start, after you click the Merge Products button, the Merge Products panel will open, and on the left you'll see the item you selected. You'll also have a Search field on the right where you can search for the duplicate.
Once you have found it, you'll see the items side by side, and you'll need to determine which one has the best primary data to keep. For example, one copy of the product might already be in a Department and in a Category and has Descriptions, and the other one might not. One way that can help to tell them apart is by looking at their creation date and time, as pictured here.
Once you have found the one with the best data, click to Preserve These Values for that item. When you do the merge, the other copy will have its data merged into the primary version, and you will be left with a single product. To complete the merge, click the Merge Products button at the bottom.
You can get to this part of the system by logging into the system and then on the left, click Inventory > Products. You can also merge products in your Purchase Orders, which you create by going to +Create New > New Purchase Order.
You can merge similar or duplicated products in your main Products page as well as in your Purchase Orders. Duplicate products are often the result of accidentally creating a new product in a Purchase Order because you might not have realized it was already saved in your system.
You can merge any two products together with this function, but at present, it does not yet work with product Variants / Options.
From your Products page, you can search for any product that might be duplicated, and on the right, click on the line-item actions button (three vertical dots), and you'll see the option to Merge Products.
If you create a new Purchase Order and add items to it, each will have the same line-item action button as in the Products page. For each, if you know there is a duplicate product you need to merge, you can click to Merge Products.
To start, after you click the Merge Products button, the Merge Products panel will open, and on the left you'll see the item you selected. You'll also have a Search field on the right where you can search for the duplicate.
Once you have found it, you'll see the items side by side, and you'll need to determine which one has the best primary data to keep. For example, one copy of the product might already be in a Department and in a Category and has Descriptions, and the other one might not. One way that can help to tell them apart is by looking at their creation date and time, as pictured here.
Once you have found the one with the best data, click to Preserve These Values for that item. When you do the merge, the other copy will have its data merged into the primary version, and you will be left with a single product. To complete the merge, click the Merge Products button at the bottom.
Click here to learn how to configure your Product module for displaying products on the website: Product Page 3.0: Part 1 - Overview
Click here to learn how to configure your Product module for displaying products on the website: Product Page 3.0: Part 1 - Overview
Click here to learn how to configure your Product module for displaying products on the website: Product Page 3.0: Part 1 - Overview
Click here to learn how to configure your Product module for displaying products on the website: Product Page 3.0: Part 1 - Overview
Your Onboarding specialist will do the Shopify integration with you in a setup call where you do a screen share.
⚠️Please Note: Before you can schedule that call, you need an active merchant account with Shopify for us to sync with.
Here is what you need to have ready for the setup call:
That's it! Your Onboarding specialist will do all the setup actions through the screen share. You can pop some popcorn and just watch them go! They may have questions for you as they work, and you can feel free to ask questions about anything. They will explain what they're doing at every step for you.
Some things to be aware of:
Setup calls take 10 - 30 minutes, depending on how many questions there are. Feel free to take all the time you need!
That's it! Your Onboarding specialist will remain available for follow up questions as needed.
Below are some general data best-practices regarding the integration that you should be aware of. Please take a look and you may want to adjust your data in some cases before the setup call.
In our system there are three primary product identifier codes you can use for your items, UPC, Manufacturer Number, and SKU. This works great internally with our reports and informational tools relating to your products, but there can be a conflict with the Shopify integration.
Shopify allows only two product identifier codes for each item, a SKU and whatever else you prefer (UPC, Manufacturer Number, etc.). In our system if you have all three of our identifiers saved for a product, we can only move two of them over to Shopify. In this scenario, the Manufacturer Number draws the short straw and does not get moved over.
Solution:
Some stores beginning our Shopify integration have a history of data in Shopify from customers they no longer work with and/or products they no longer carry. If this is your situation we highly recommend cleaning out the old data and deleting anything you wouldn't want in both systems. After the integration, it will be twice as much work to clean them out.
In our system, if you track weight values for your items, you choose either Pounds or Kilograms, and enter those values as decimals. So something that weighs 24 ounces would be entered as a weight of 1.5 (pounds), and something that weighs 1,500 grams would be entered as 1.5 (kg).
Shopify allows you to specify either pounds or ounces, kilograms or grams, and they won't translate if they're entered with either of the smaller measures. For example, in Shopify, if you have a product with a weight value of 8 and it's set to work in ounces, in our system that would show up as 8 pounds. Similarly, an item with a weight value of 250 set to work with grams in Shopify will show up as 250 pounds in our system.
Solution: Adjust the way you list your items in Shopify so they work with pounds or kilograms instead of ounces or grams.
You can easily update products already saved in the system with new or missing information using the Product Catalog tool. This is especially useful when a product is missing important details such as images or descriptions that can be found in the Product Catalog.
You can easily update products already saved in the system with new or missing information using the Product Catalog tool. This is especially useful when a product is missing important details such as images or descriptions that can be found in the Product Catalog.
You can easily update products already saved in the system with new or missing information using the Product Catalog tool. This is especially useful when a product is missing important details such as images or descriptions that can be found in the Product Catalog.
You can easily update products already saved in the system with new or missing information using the Product Catalog tool. This is especially useful when a product is missing important details such as images or descriptions that can be found in the Product Catalog.
Simple definitions of these items are below. It is important to understand that not all products will have a UPC or Manufacturer ID. Much of that depends on whether the manufacturer has gone to the effort of creating these.
UPC - The Universal Product Code (UPC) is an assigned number the manufacturer can obtain for a product through a registration process. This code is a completely unique identifier for that product. Many product will not have a UPC due to the amount of effort required. The UPC contains only numbers.
Manufacturer ID - This is typically the identifier assigned to a product by the manufacturer. These codes can contain letters, numbers, and simple punctuation such as hyphens, colons/semicolons. These codes should not contain spaces.
SKU - This is an identifier specifically for your unique use. You can create your own SKU codes according your preference, you can also click in the SKU field to have the system create a unique SKU number for you, as pictured below. These codes can contain letters, numbers, and simple punctuation such as hyphens, colons/semicolons. These codes should not contain spaces.
The descriptions previously known as Short Descriptions are now called Meta Descriptions. They are not meant to be customer-facing descriptions: they are provided to the search engines and are used as the SEO Description for each product page. They serve a critical role in getting your products indexed for web searches that will drive customers to your website, so offering solid Meta Descriptions of all of your products is highly recommended. If your product has no other descriptions, the Meta Description will display for your customers.
The descriptions previously known as Short Descriptions are now called Meta Descriptions. They are not meant to be customer-facing descriptions: they are provided to the search engines and are used as the SEO Description for each product page. They serve a critical role in getting your products indexed for web searches that will drive customers to your website, so offering solid Meta Descriptions of all of your products is highly recommended. If your product has no other descriptions, the Meta Description will display for your customers.
The descriptions previously known as Short Descriptions are now called Meta Descriptions. They are not meant to be customer-facing descriptions: they are provided to the search engines and are used as the SEO Description for each product page. They serve a critical role in getting your products indexed for web searches that will drive customers to your website, so offering solid Meta Descriptions of all of your products is highly recommended. If your product has no other descriptions, the Meta Description will display for your customers.
The descriptions previously known as Short Descriptions are now called Meta Descriptions. They are not meant to be customer-facing descriptions: they are provided to the search engines and are used as the SEO Description for each product page. They serve a critical role in getting your products indexed for web searches that will drive customers to your website, so offering solid Meta Descriptions of all of your products is highly recommended. If your product has no other descriptions, the Meta Description will display for your customers.
Yes, they absolutely will! Even if you have Unlimited Web Inventory active as an option for your products, the system will still track inventory quantities and reduce the inventory count with each order.
Yes, they absolutely will! Even if you have Unlimited Web Inventory active as an option for your products, the system will still track inventory quantities and reduce the inventory count with each order.
Yes, they absolutely will! Even if you have Unlimited Web Inventory active as an option for your products, the system will still track inventory quantities and reduce the inventory count with each order.
Yes, they absolutely will! Even if you have Unlimited Web Inventory active as an option for your products, the system will still track inventory quantities and reduce the inventory count with each order.