The Waitlist feature allows retailers to manage customer interest in out-of-stock products and full classes. You can have the system notify customers by email when items become available again. Take a look at how the Waitlist functions in the Register, on the website, through notification emails, and in reports.
This is a Beta feature, so to enable it, you can click on the Admin Button with your username in the upper right and go to Beta Features and turn it on from there. Be sure to Save at the bottom when you're finished.
Setting Up Your Waitlists
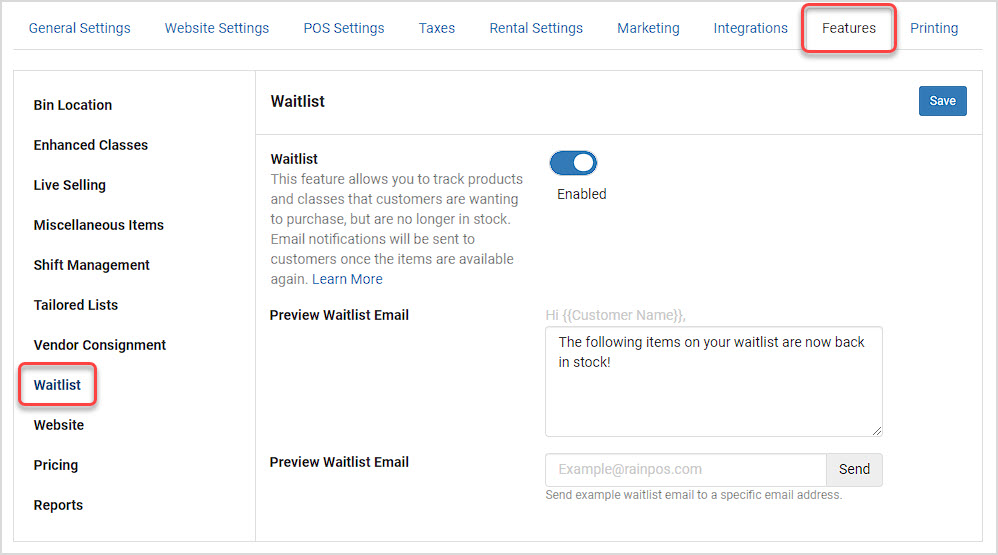
You can activate Waitlists by clicking on the Admin button with your username in the upper right and going to Settings > Features > Waitlists, as pictured above.
- Toggle the feature on near the top.
- For the Waitlist Email, the default text the system will use is reproduced for you above, but you can add a custom message if you'd like to use your own words. This email will be sent to customers whenever items on their Waitlists, whether they are products or class seats, become available again.
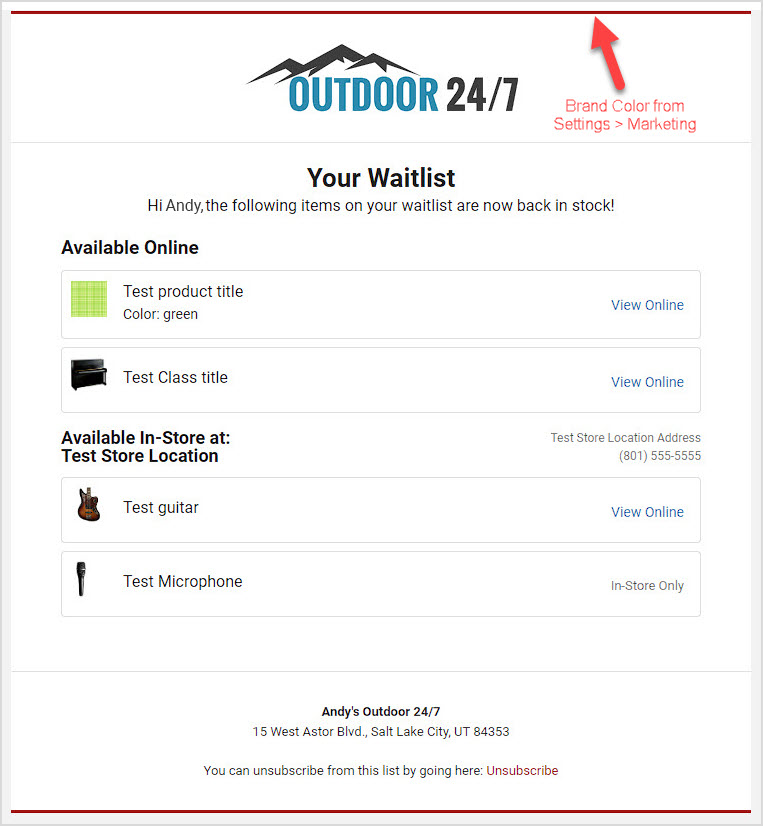
- If you wish to preview the email, enter your email address and click Send and an example will be sent to you. Please note that products available online and products available only in-store will be in different sections, as pictured below.
Example Waitlist Email
Using Waitlists in the Register
With the Waitlists feature enabled, you will be able to work with the Waitlists of your customers in the Register from the Customer Actions panel. Here is what you can do:
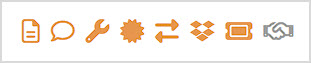
- After loading the customer into the Register, click on any of the Customer Action icons in the upper right. (At present there is not an icon for Waitlists.)
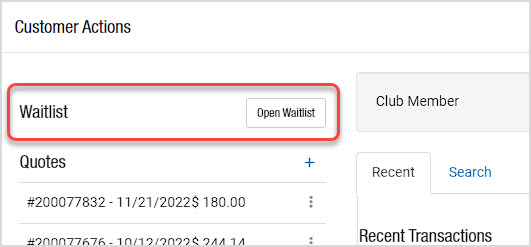
- Customers have a single Waitlist and once the Customer Actions panel opens, you'll see a button at the top to Open Waitlist. Click it and a window will open.
- In the Customer Waitlist window, you can see the customer's information. You can search or scan in items and classes the customer needs and specify the Quantity / Number of Seats, the condition level (for serialized items), and the date (for classes). You can remove items with the X buttons on the right. You can check if items are In Stock, and you can see if a Notification has been sent. Please note that Fulfillment Location only displays if your store has multiple Locations set up in the system.
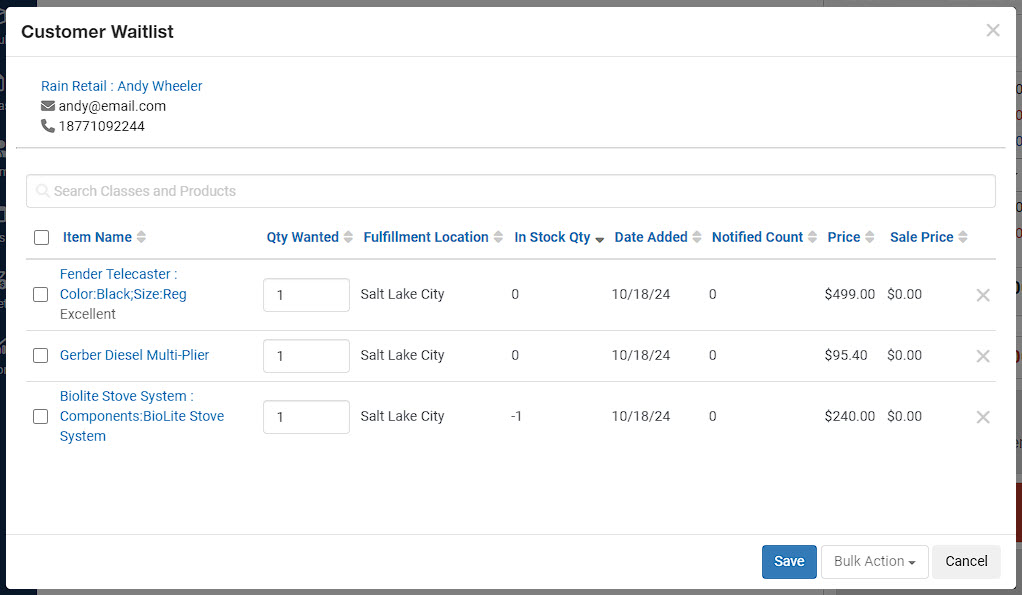
- You can use the check-boxes on the left if you need to do any bulk actions. Once you've selected the line items with which you want to work, in the Bulk Actions menu, you can either Add to Register, or Remove the items.
- If you make any changes to the list, be sure to remember to click Save before closing the window.
- The system will let you know if any required information isn't present when adding items and saving your waitlists.
- Please Note: Items will automatically be removed from the waitlist whenever they are purchased by the customer.
Setting Up Products and Classes for Waitlists on the Website
You can set your products and classes to be able to be added to Waitlists from your website. Here is what to do for your products:
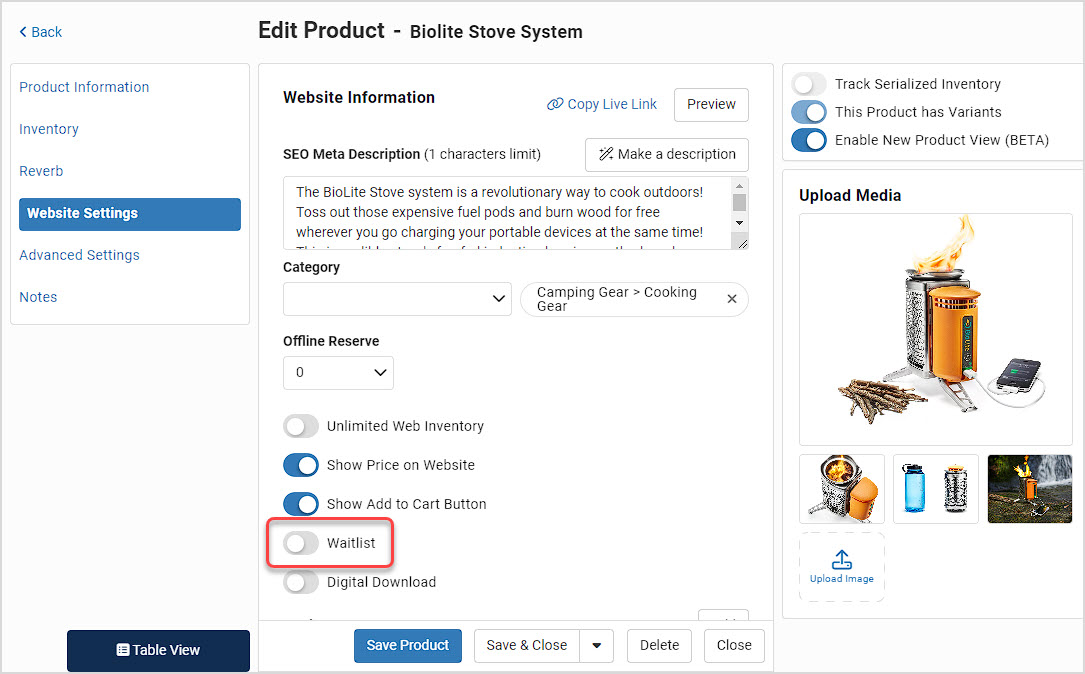
- Open the product and go to the Website Settings tab.
- Scroll down to the area where you see several toggles, and the one for Waitlist will be near the bottom.
- Turn it on, then Save the product.
For your classes, you can also set them to be able to be added to the Waitlists of your customers from the website, here is what to do:
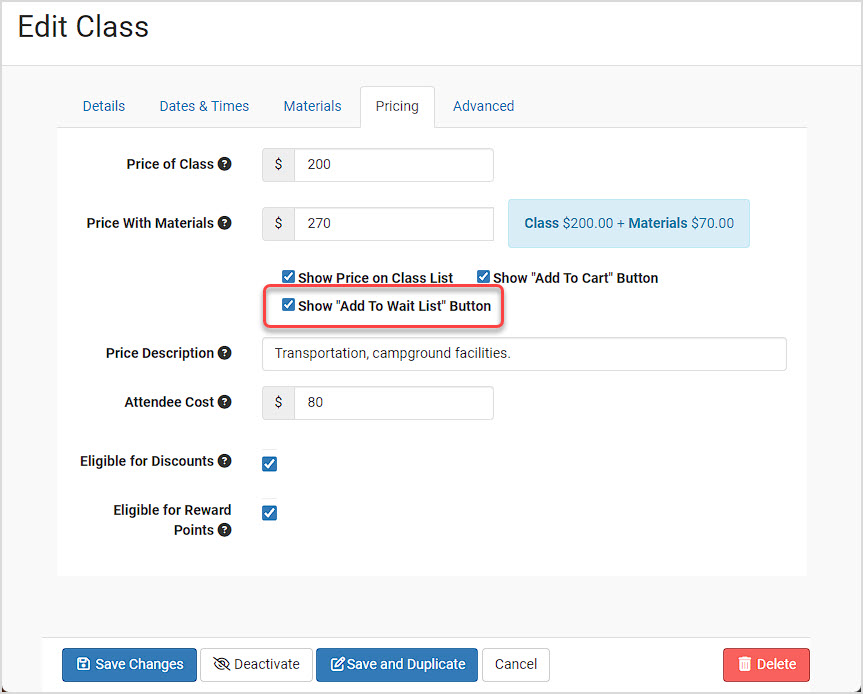
- Open the class and go to the Pricing tab.
- Find the checkbox for Show "Add to Wait List" Button and check it.
- Save the class.
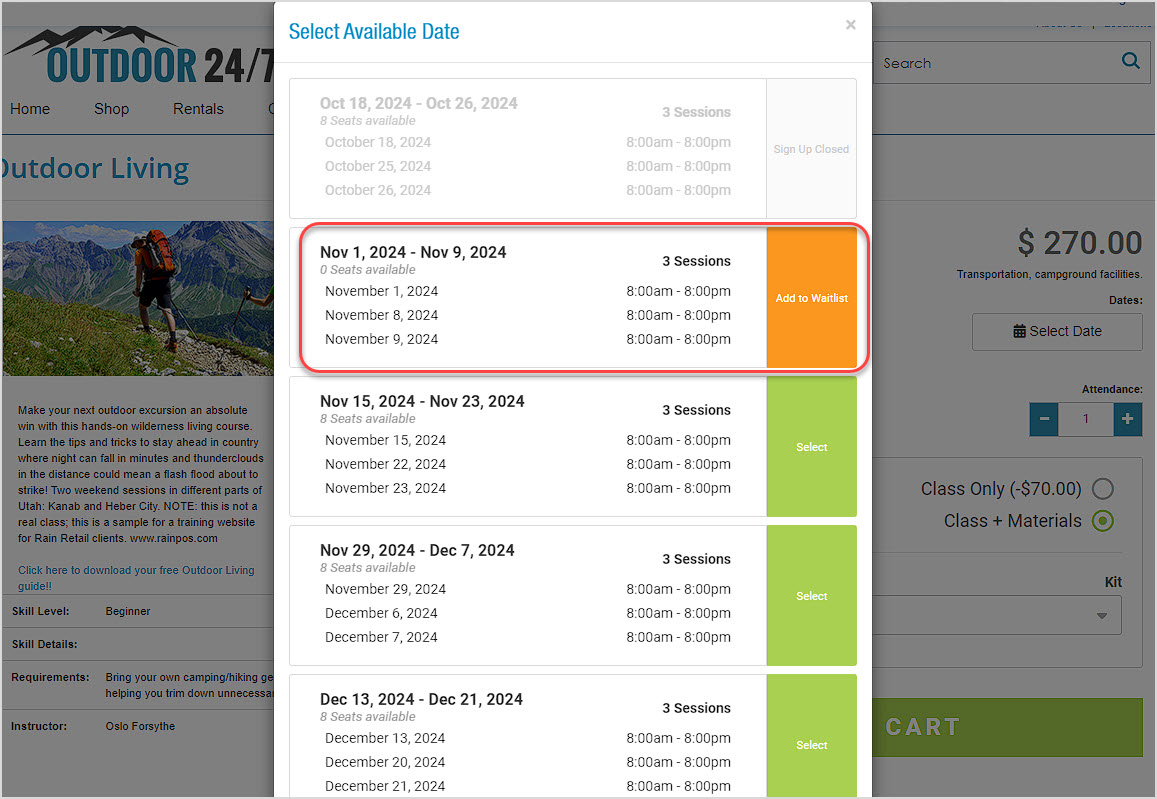
If the product is out of stock or if the class seats are full, website visitors will see an Add to Waitlist button like the one pictured below.
Using the Waitlist Report
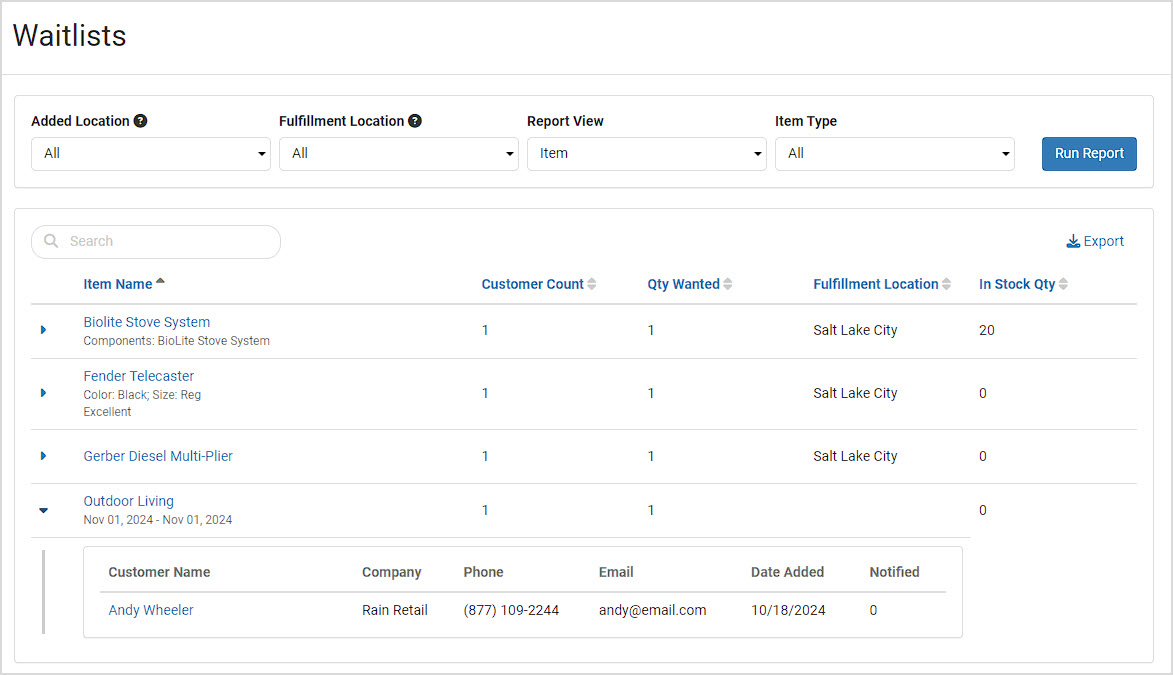
You can see all of your waitlist items and classes by going to Reports and in the Marketing section, click on Waitlist.
- You can filter the report by the location at which the item was added to the Waitlist with the Added Location column. Please note, this doesn't have a column in the report, but when you filter by this the data in the report will only show items added from your selected Locations.
- You can filter by Fulfillment Location, which is the location you will use to fulfill an order for the item. Also note that Fulfillment Location only displays if your store has multiple Locations set up in the system.
- You can change the layout (Report View) to be the Item based view above, which lets you expand the item to see which customers have it on their Waitlist. Or you can use the Customer layout, which has customer line items that can be expanded to see whatever items each customer has on their list.
- You can filter the report by Item Type to view Products, Classes, or All (default).
- When viewing Customer data in the report, there is a column to show you if the customer has been Notified about the item coming into stock or not.
- When viewing data about an item, the In Stock Quantity provided is referring to what is available at the Fulfillment Location, or the Physical Location in the case of single location stores.
Click to Run Report when you have it configured the way you want, and the results will populate below. Each line item can be expanded as shown above. For customers, you can see if they've been notified by email about the item coming back in stock.
If you like, you can Export the data to a CSV spreadsheet file that will contain data for whatever the report currently displays in its filtered state. The export file will show you what your filter settings are for your reference.
You can use the Waitlist report to keep your finger on the pulse of what your customers are interested, and it can point you in the right direction of what you need to order next from your vendors.
 October 01, 2024
Is this page helpful?
×Help us improve our articles