Tracking Your Sales Commissions
You can get to this part of the system by clicking on Reports in the blue Admin Toolbar and then clicking Sales Commissions. If you have not yet activated this function, please read below to see how to turn it on.
Sales Representatives
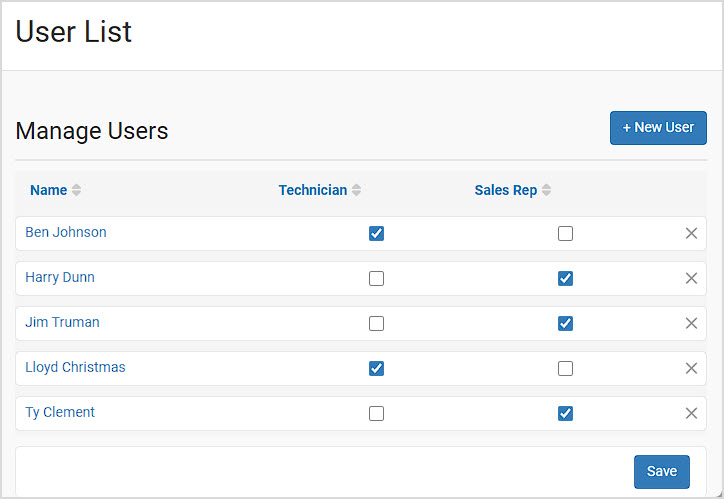
For any of your employees to be able to track sales commissions, you will need to make sure they have a user account saved in the system. You can create accounts by clicking on the Admin Button with your username in the upper right and then going to Users > Users. No special setup is required for a User to be a listed Sales Representative, just make sure they have a User account and that they are set as a Sales Representative, as pictured below. For more information on setting up Users and permission levels in User Groups, please click here: Set Up User Logins and Groups.
Configuring Your Sales Commissions
To configure settings for your Sales Commissions, click on the Admin Button with your username in the upper right and go to Settings > POS Settings, and in the General tab that loads, look in the lower part of the right column for the Sales Commissions section pictured below.
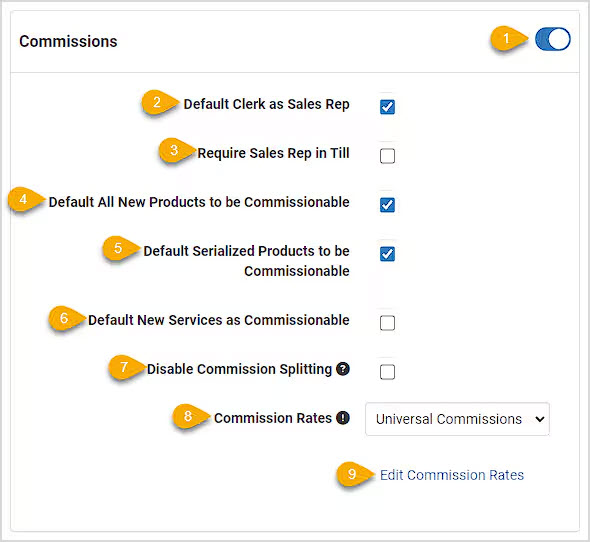
- Use Commissions in the Register - Toggle this On to activate Commissions functionality within your Register.
- Default Clerk as Sales Rep - This setting will assume that whoever is signed in as the Sales Clerk in the Till is the sales representative, and will put their name in for any commissionable items. For full details on how to configure and work with commissions, click here: Sales Commissions.
- Require Sales Rep in the Register - If every transaction for your store should have a Sales Representative, turn this setting on and your clerks will have to set one in order to start a new transaction.
- Default All New Products to be Commissionable - If the bulk of what you sell are commissionable inventory, you should turn this on. Within each product, you can set whether they generate sales commissions in the product's Advanced tab.
- Default Serialized Product to be Commissionable - If the bulk of the serialized inventory you sell is commissionable, turn this on. Any that need adjustment can be changed on the product's Advanced tab.
- Default New Services as Commissionable - If all of your services are commissionable you can have them automatically set that way by turning this on.
- Disable Commission Splitting - In normal commissions listing, you can split commissions as many times and any way you like by percentage between reps. If you don't work this way, you can check this box to allow only one sales rep per transaction.
- Commission Rates - You can set whether your commissions are paid out on universal percentages or on individual ones, more below on how to configure those percentages.
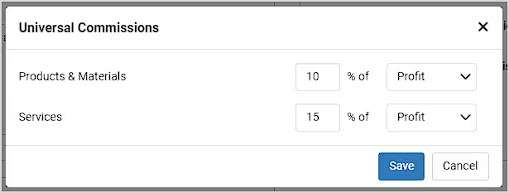
- Edit Commission Rates - For whichever commission style you use, you can click the link to Edit Commission Rates and you'll be able to set general percentages used by all your sales reps under the Universal Commissions and base them either on the Profit the store earns on the items or on the Retail price, whichever you use:
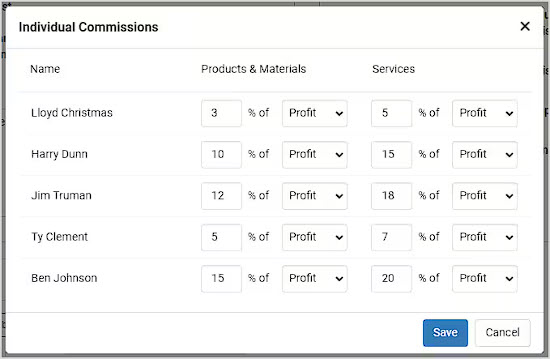
Or if you use Individual Commissions, you can set your percentages based on each sales rep's seniority, performance, and whatever other criteria you use. (Please note that you can set a User to be a Sales Rep by going to the Admin button at the top that has your username and clicking on Users > Users.)
Configuring Products to Be Commissionable
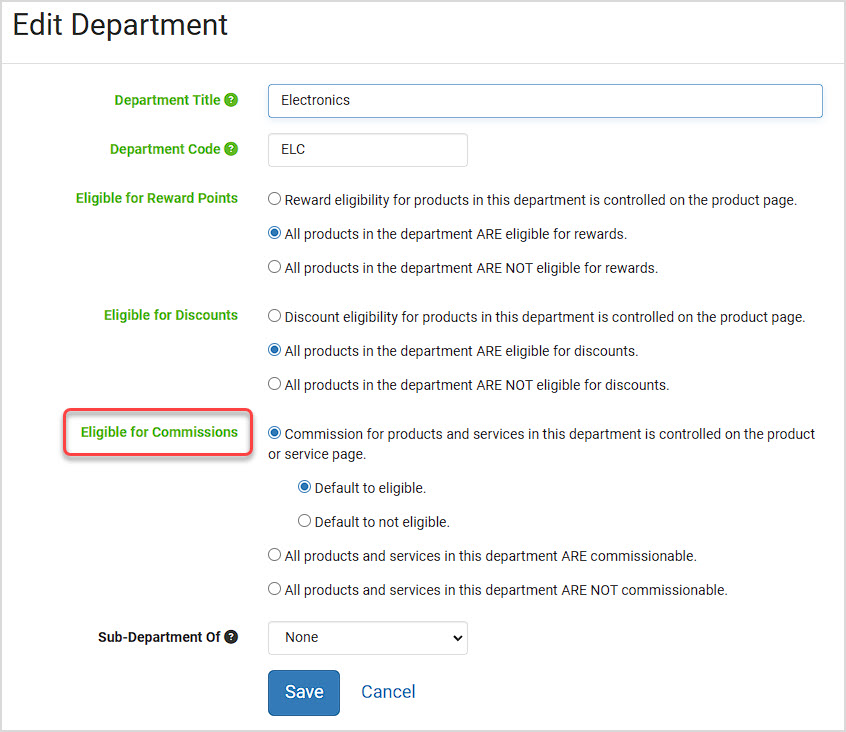
You can set any product saved in your system under the Inventory menu to generate Sales Commissions whenever they are sold through the Point of Sale. The first way to do this is at the Department level. If an entire department in the system will have all items eligible or to NOT be eligible for commissions, this is a great way to set them all at once. Go to Inventory > Departments and then click on the Department you want, and in the section highlighted below, you can set t the way you want. Be sure to Save when you're done.
If items in a department will have mixed eligibility for commissions, you can set it at the individual product level, as pictured below.
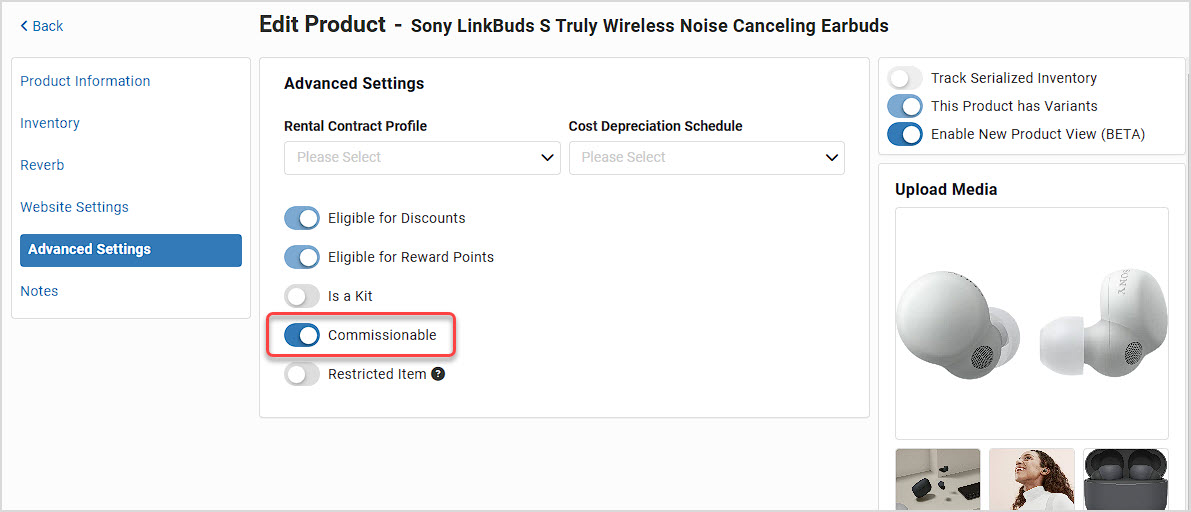
- Go to Inventory > Products and search for the product you want, then click on its Title to open the detail view.
- Click on the Advanced Settings tab.
- Toggle the Commissionable option to On, as pictured above.
- Save the product.
You can also configure products to be commissionable in bulk with the following steps:
- Go to Inventory > Products.
- Search and / or Filter for the products you want.
- Check the boxes on the left for the ones you want to modify.
- Click the Bulk Actions button and click Edit Products in the drop-list.
- In the Edit Products panel that opens, click the drop-list to Select Items to Edit and find Commissionable and click on it.
- Click the drop-list for Commissionable, set it to Yes, and click to Save that preference.
- After applying any other edits you want, at the bottom of the panel, click Update Products, and you're all set!
Setting the Sales Representative for a Transaction
When doing a transaction from the Register, you can set the Sales Rep(s). You can do this from the right-side of the screen by clicking the blue pencil next to Sales Rep, as pictured below.
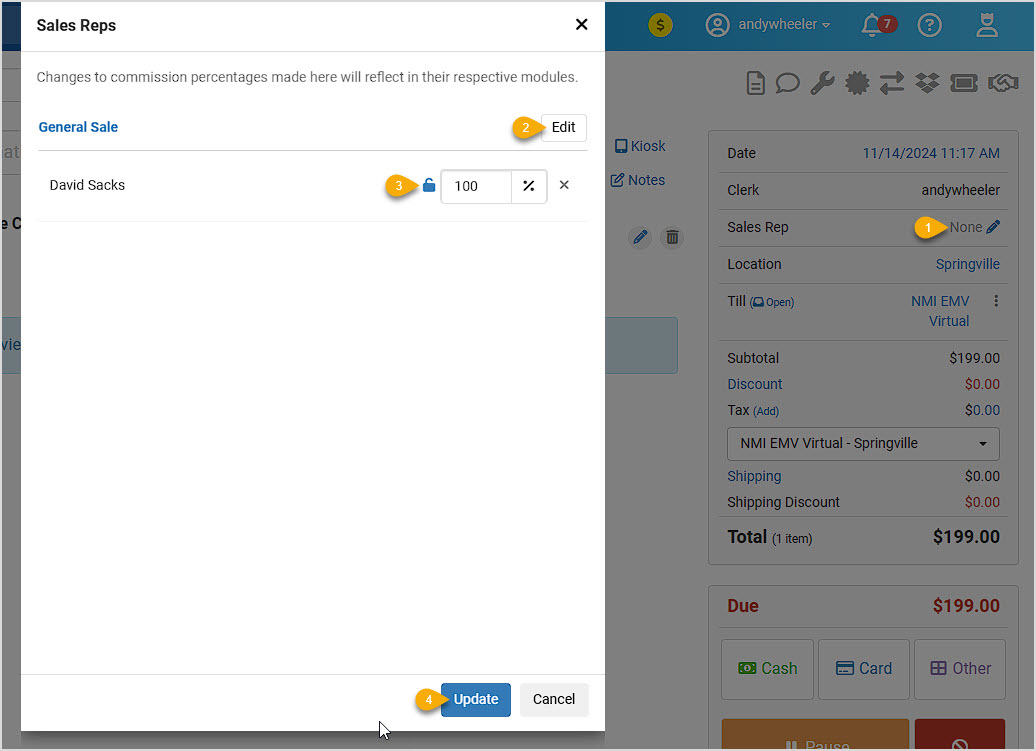
- Edit / Set Sales Rep(s) - When you click the blue pencil, a panel will pop up that will show you whoever might currently be the sales rep for the transaction. If you need to remove the rep, you can use the X button on the far right of their name's line item.
- Edit Button - Clicking this button will open a panel that will show you a list of every Sales Rep you have in the system. You can click on as many as might be splitting the sale, then click Update and the Sales Rep(s) will be set for the transaction, as pictured above. A single rep will automatically get a 100% cut of the commissions, and multiples will split that evenly (as pictured below).and let you search for the Sales Rep(s) you want.
- Percentage of Commission - If you only enter one name, that name will display in the Register and the rep will get 100% of the available commission on the sale. If you search for more than one name, commission will be initially split evenly between the reps, or you can adjust one of the splits and then click on the other and the split will adjust for them appropriately, as pictured here.
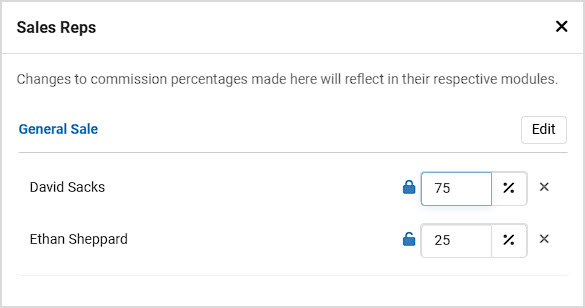
- Update - Clicking this will set your selections for the transaction, and you'll be able to see the sales rep(s) in the Register, as pictured below.

Please note that this is not determining the percentage of the sale amount that will be paid to the sales representatives, just what percentage of the commissions themselves the rep(s) will receive. Also note that only commissionable items in the transaction will count toward the sales commissions.
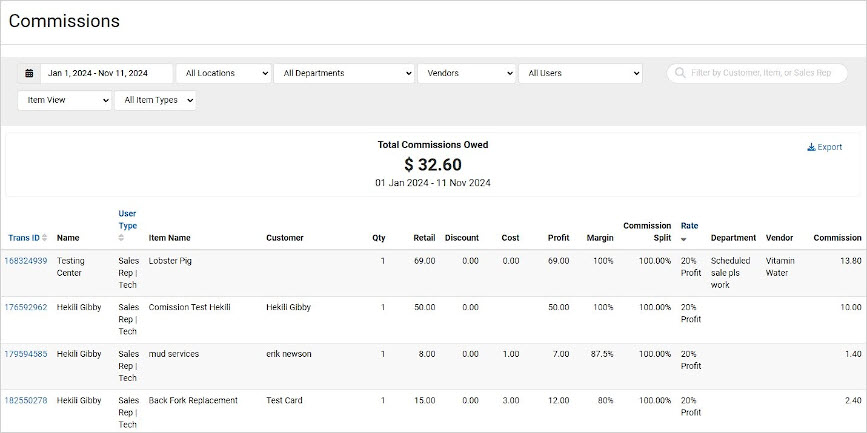
Commissions Report
You can look at whatever time frame you need and see each item that was sold that generated commission, who the Sales Rep was, the Customer, Pricing, Profits, and the Commission Split percentage for that rep. This report is intended for managerial use, and its visibility and access can be configured by going to the Admin button with your username Users > Groups and setting the permission level for the group.
 October 01, 2024
Is this page helpful?
×Help us improve our articles