You can create periodic subscription programs of any length with products you have created already by going to Modules > Subscriptions.
Please Note: This feature is a special function that is not part of the normal system service, so if you are interested in using this feature, you will need to call or email Support to have this added to your service plan.
Once this is active for you, you can go to Modules > Subscriptions and create new product subscriptions for your customers. Please note that you must have the following things in place to start a subscription:
- You must be set up for integrated processing with in order for this to work.
- The Subscription module uses tokenization to safely and securely do the periodic charges to the customer's card, so you also must have your Recurring Payments tokenization set up with the processor. If you use Payments for your integrated processing you have this automatically.
- You must also have all products created and saved that will be sold in the subscription.
- You must have Faceted Web Search turned on under Beta Features in order for your Subscriptions to display on your website.
Setting Up Subscriptions
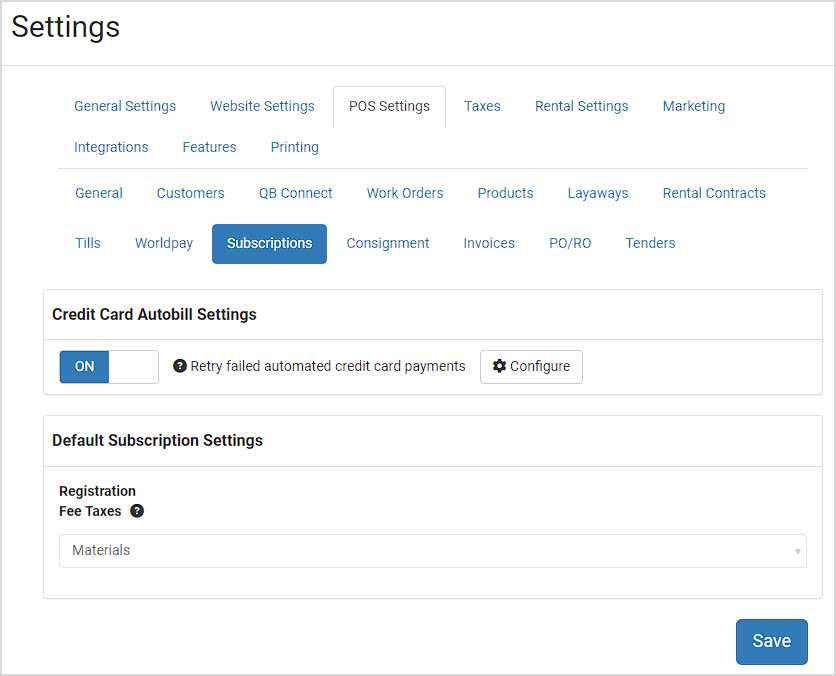
Before setting up your first Subscription, you will want to go into the Settings area and configure your Autobilling. In the upper right click on the Admin Button and go to Settings > POS Settings > Subscriptions.
If you want the system to make repeated attempts to charge a card if it fails, turn the function ON.
Next, click the Configure button to set how often and for how long the system will continue to retry charging a card:
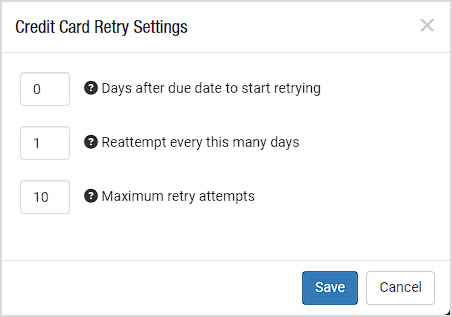
Once you have your preferences set, click the Save button to close the Credit Card Retry Settings panel.
You are also able to set the Default Tax Jurisdiction to be applied to your subscription Registration Fees. Just click the drop-list and set your preferred tax that will be applied to the Registration fees for any Subscriptions you create moving forward.
When you're done, click the Save button at the bottom of the Subscriptions tab to save your final settings. Now you're ready to start your first Subscription!
Working With Your Subscriptions
Go to Modules > Subscriptions. Here is the main Subscriptions page:
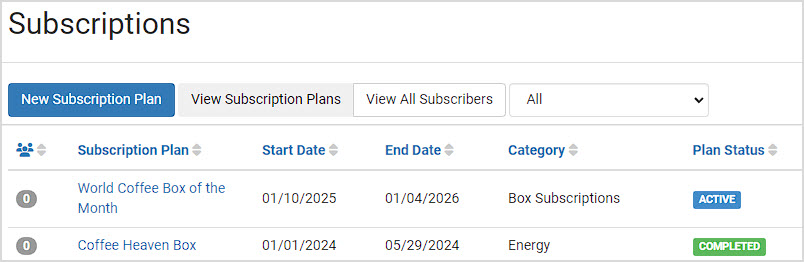
To create a new Subscription, click the New Subscription Plan button, and you will see a blank version of this:
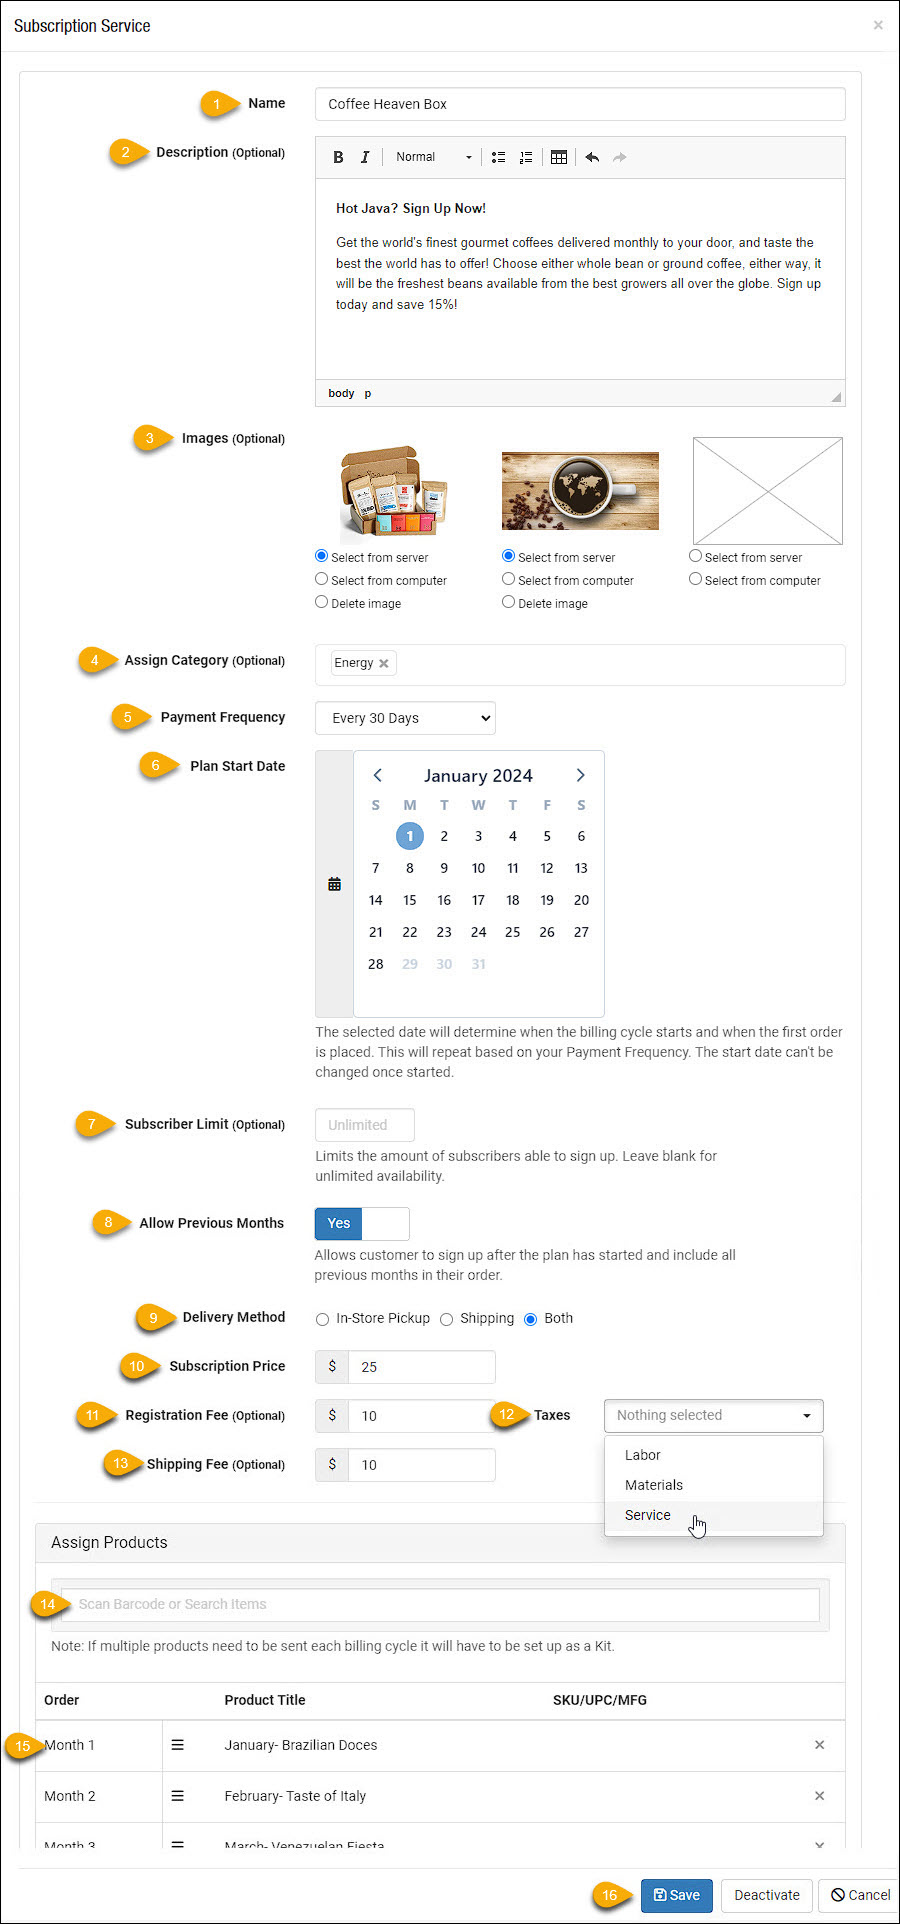
- Name - Give your subscription a full, intuitive name.
- Description - Make sure your subscription has all details provided so subscribers will know what to expect. You can format text in limited ways and create small tables to organize information, if needed.
- Images - You can add as many images as you like. Please follow the same rules you would with any product: Images need to be Jpeg or PNG, 600+ pixels, and the file size should not be larger than 4mb / 2000px.
- Assign Category - Click in the box to choose as many saved product Categories as you like.
- Payment Frequency - Click the drop-list to choose either Every 7 Days or Every 30 Days or Every 90 Days.
- Plan Start Date - Click in the calendar and choose the date the subscription will start. Note that the selected date will determine when the billing cycle starts and when the first order is placed. The start date cannot be changed once the subscription has started.
- Subscriber Limit - If you have limited availability for your subscription, e.g. you can really only handle twenty-five of them a month, you can set the number here by either typing it in or using the arrow keys to get to the number. If you leave this blank, the subscription will be able to take an unlimited number of customers.
- Allow Previous Months - This option will allow anyone signing up in the middle of your subscription to catch up to the current month. Basically, in either the web shopping cart or in the point of sale Register, it will load whatever weeks or months have already passed as individual line-items and then start the subscription from the current upcoming week or month. Please Note: Anyone choosing this on the website will see that the system uses your website settings for Shipping for however many Subscription items are being shipped instead of the set amount for the individual Subscription shipments. This is done because multiple months may result in a very different shipping charge when many are sent at once.
- Delivery Method - Use the radio-buttons to choose either In-Store Pickup, Shipping, or Both. On checkout, the customer can choose their method if you offer both.
- Subscription Price - This is the periodic fee each subscriber will pay, NOT the total of the whole subscription. So this would be the base monthly or weekly payment they will make throughout the subscription.
- Registration Fee - This optional fee is a one-time, up-front fee to get the customer registered for the subscription series.
- Taxes - The tax that is applied to your Registration Fee will follow whatever default is set as described in the Settings section above, but you can manually adjust it here if needed.
- Shipping Fee - If you know what the shipping will be on your subscription items, you can set this fee to automatically charge every month.
- Assign Products - You can assign a product to each periodic instance of the subscription, e.g. every month in the year, every week, for however long your subscription runs. You can only assign one product per period, so if you need to bundle multiple products in a single billing cycle, build them into a kit using the Assemble Kits module.
- Subscription Products - If you need you can drag and drop the items into whatever order you need. You can use the Delete button on the right to remove an item, if needed. Once the subscription starts, the items are locked into the subscription and can no longer be reorganized.
- When you're finished, be sure to click the Save button at the bottom of the panel. You can also Deactivate your Subscription if you need to delay it becoming visible on your website and/or in your Register. Cancel will just close the panel.
Working With Your Subscriptions
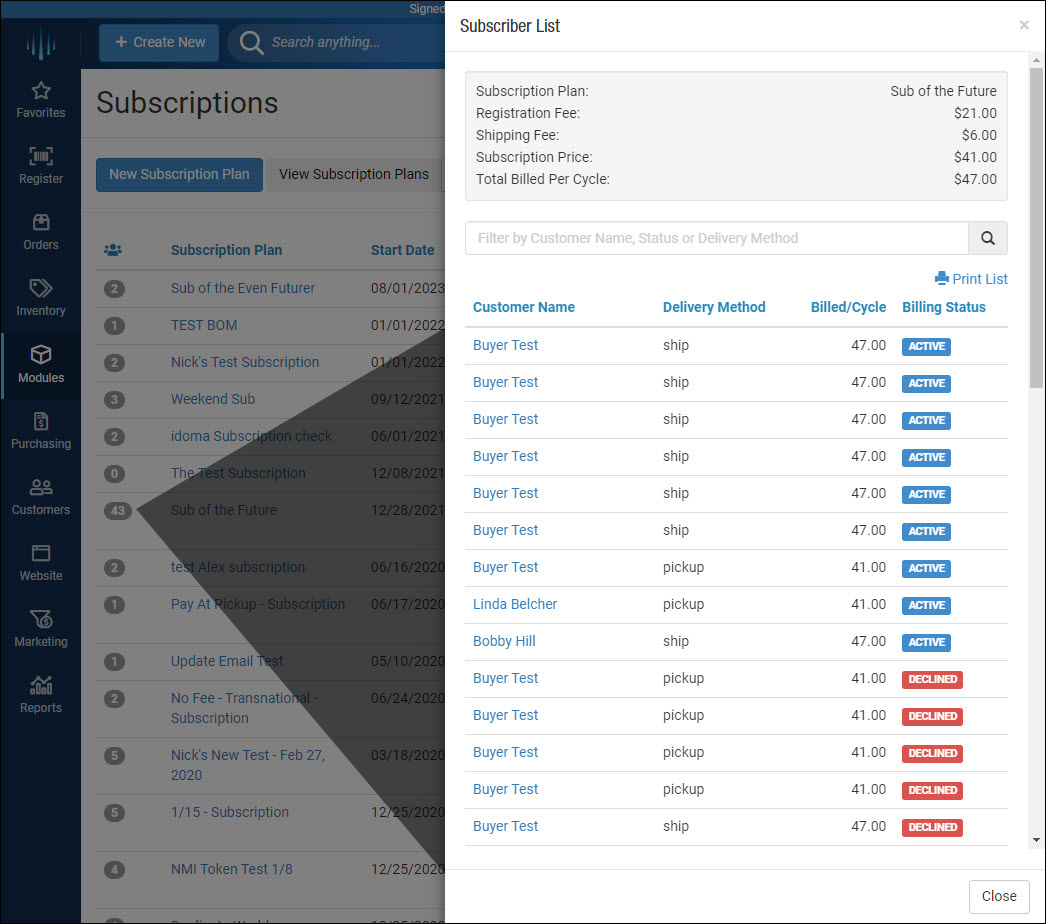
Once your subscription is in process you can always click on its title to view or change details. You can also see how many people are subscribed in the gray circle on the left. You can click on the circle to bring up your Subscriber list, with each customer and their subscription status listed, as pictured below.
You can sign people up through the Register with the customer loaded, just by searching for the Subscription name in the item search area:
Your customers will also be able to sign up and subscribe online. Here is what the same test subscription looks like on a web page:
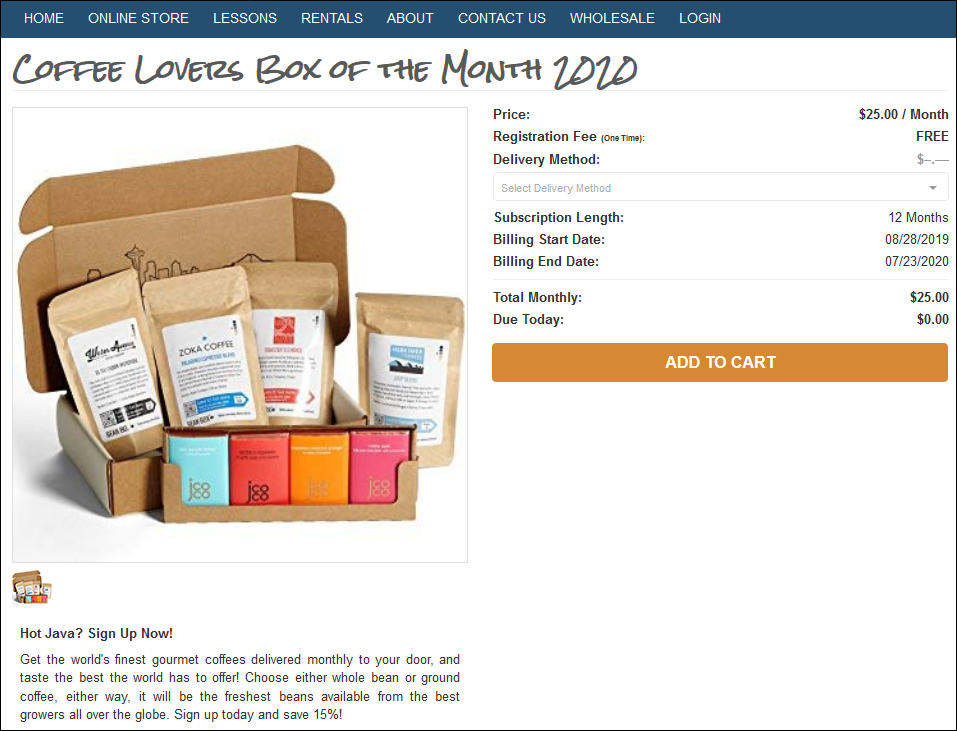
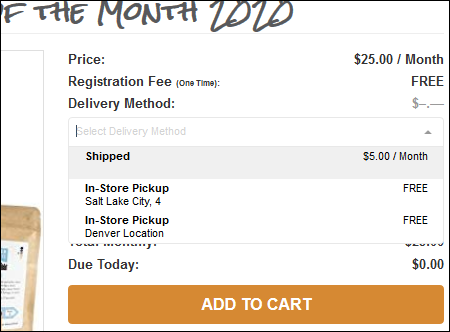
If you have selected Both for your delivery method, your customers will have a drop-list to select either having the items Shipped or doing Store Pickup:
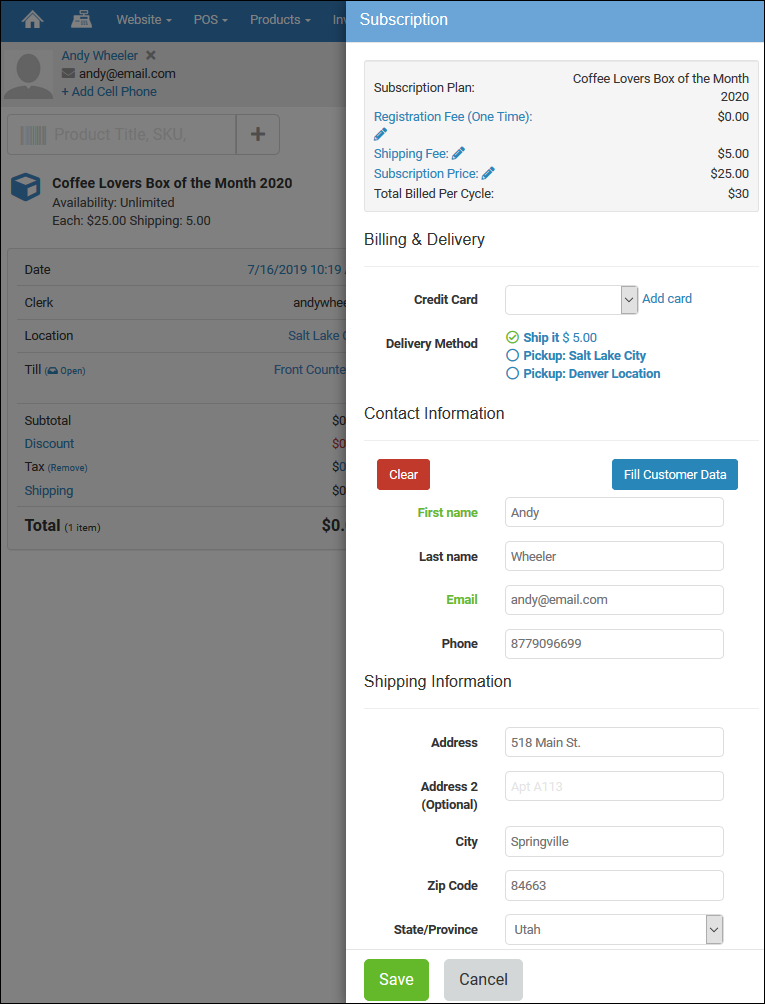
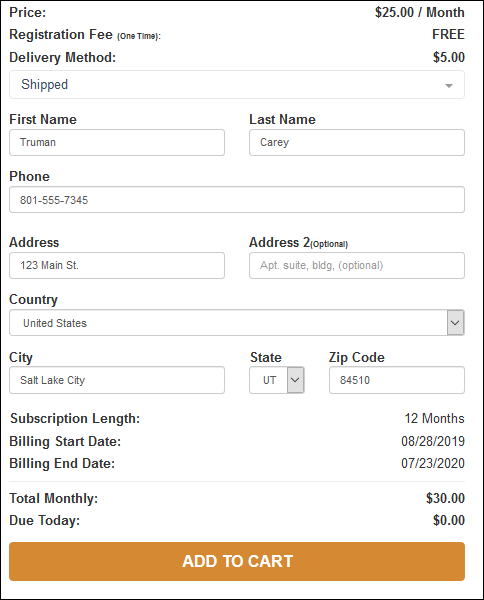
If your customer chooses to have it shipped, just as in the Register example above, they will enter their shipping address directly on this web page. They will later put in billing information once they click the Add to Cart button.
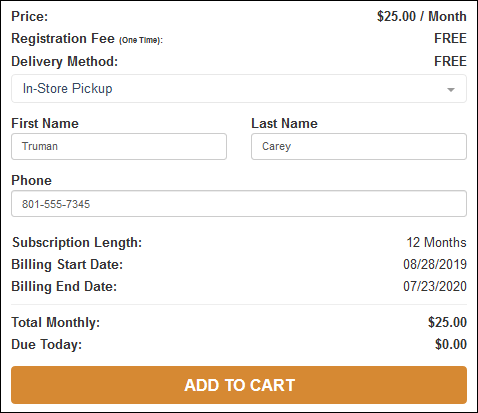
If the customer chooses In-Store Pickup, they will still need to put in subscriber information, as this may be different from the person paying for the subscription during checkout:
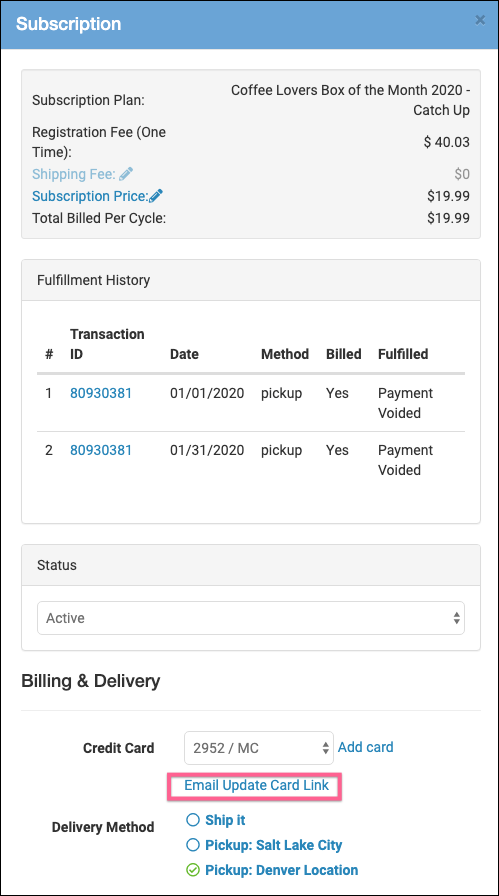
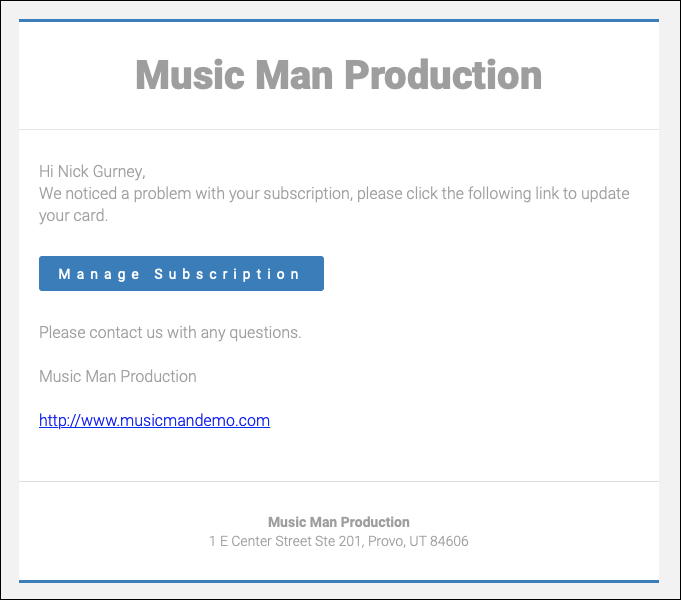
Once the Subscription has started, if the card on file is declined, you have the ability to email the customer a request to update their card information. You can open this panel by going to Products > Subscriptions, clicking on the number in the gray circle on the far left, then clicking on the Name of the subscriber who needs to update their card. Here is what that looks like:
The email that is sent will look like this:
 October 01, 2024
Is this page helpful?
×Help us improve our articles