Bulk Email Newsletters

October 01, 2024
To start, click Marketing on the left and then click on the Email button.
The Email Marketing tool is your hub for all of your bulk mailing activity. Whether you’re sending out your latest newsletter or getting a new online promotion to your client list, the Email Module is where you’ll go to actually send out your messages. This module doesn't work like traditional email: you won't have an Inbox. It is for mailing out to large numbers of people in a way that is safe.
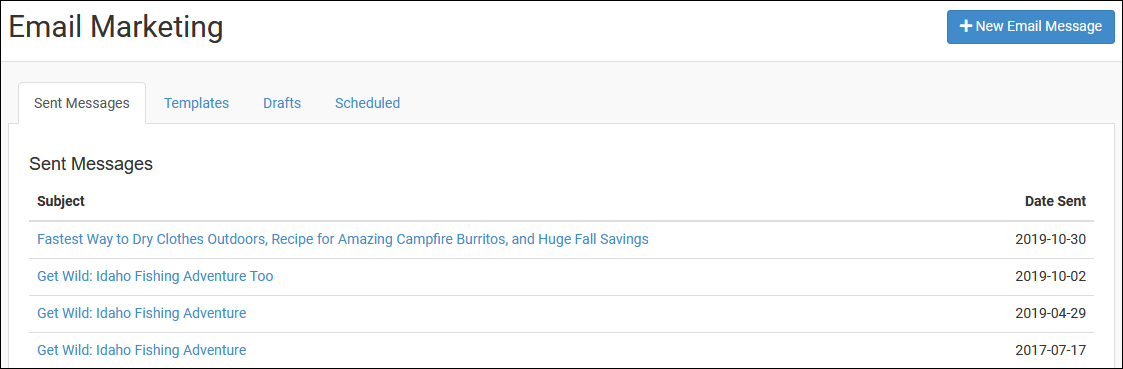
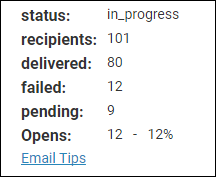
Once you open the Email Module, you will see a list of all Sent Messages you have mailed from the system. They are listed chronologically. Clicking on a message will show you the statistics for its delivery (see below) for 30 days after the message has been sent. It's best to give the system time to complete sending, so checking after four to six hours to give your recipients time to check their email and open it would be best.
You also have tabs on this page for any saved Templates you might have, any Drafts, and for any messages you have Scheduled to go out. In all of these areas, you can click on messages to edit the Subject and Body as needed.
Compose and Send an Email Marketing Message
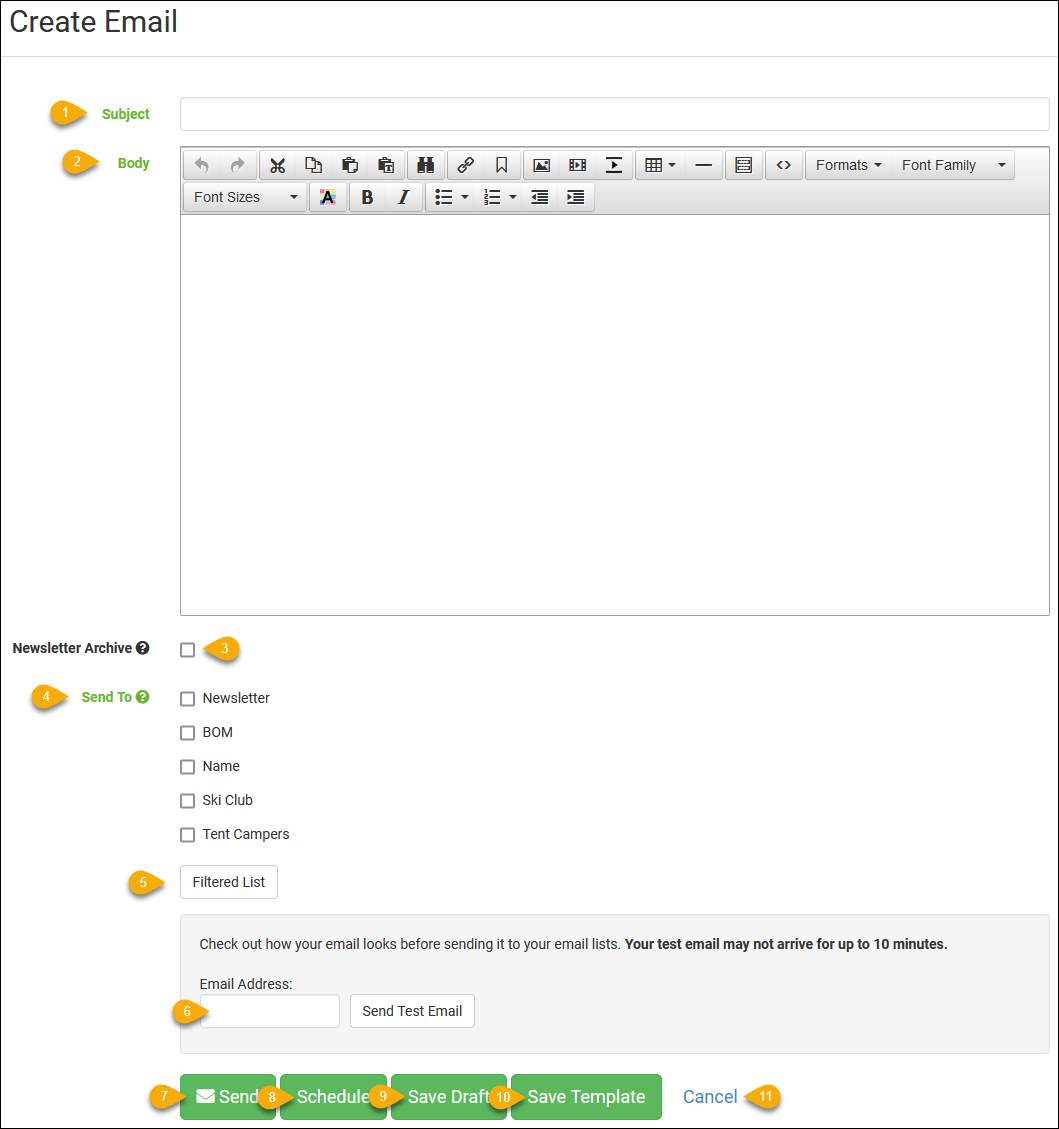
Click the New Email Message button to start composing your message. Here are the steps to compose and send an Email Marketing message from :
- Enter the title of the message in the Subject field exactly the way you will want it to appear to your readers. A Subject is required in order to send out your message.
- In the Body area, you have the opportunity to add rich content using our Content Editor. You can add images, links, tables, and you can embed special content with html code, if you like, such as YouTube video. Compose your message here.
- If you wish to add the message to your Newsletter Archive, put a check in the box. You can use the Newsletter Archive module to list your newsletters on your website, if you like.
- Be sure to select the E-mail List(s) to send to. A mailing list selection is also required in order to send out your message.
- You can click the Filtered List button and send your message to any saved Filtered List from the Filters module. Click here to learn how to work with the Filters module: Filter Customers.
- You can enter your e-mail address and click on the Send Test Email button to see if the message will go through spam filters. Please see the note below about how to correctly format your content to avoid being blocked by email providers that have very strong message filtering. If your message has not come through within ten minutes, most likely you need to decrease the amount of image content and increase the amount of text content.
- When you’re ready to send the message, click the Send button.
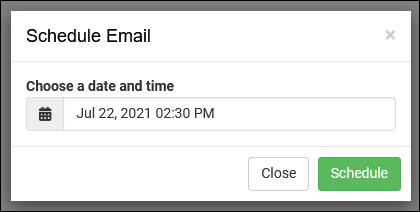
- You can click to Schedule your email with the date and exact time you want the email to be sent.
- If you need to work on your message some more, but don't have time, click Save Draft. Drafts are saved under the Drafts tab until you send them out, so they are not permanently saved like your Templates.
- When your message is ready, it's a good idea to click the Save Template button if you are sending a newsletter or similar mailout that will follow the same format. Save Template makes a permanent save of the message. You can access any of your saved templates on the Templates tab.
- If you do not wish to keep what you have started in this window, click the Cancel link and it will go back to the main Email Marketing page without saving what you have done.
Please Note: This will clear all your work on this page and you will not be able to get it back.
For more detail on working with your Email Marketing module, click here: Email Marketing.
Steps for Adding a Customer to a Mailing List Click Customers > Customer List. Search for the Cus
Working with Email Lists To get to this area, click Marketing > Email Lists. The main screen of t
Go to Marketing > Coupons and click the +New Coupon button to begin creating your coupon. When cr
Is this page helpful?
×Help us improve our articles