Working with Bulk Email
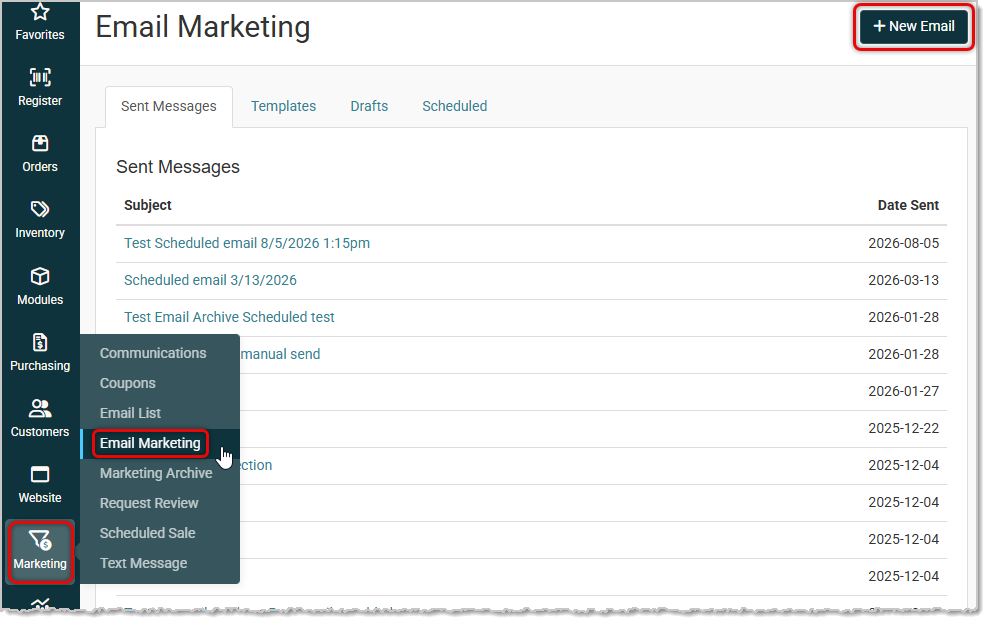
To start, click Marketing from the main menu on the left, then click Email Marketing in the pop out menu. The Email Marketing page is your hub for all of your bulk mailing activity. Whether you’re sending out your latest newsletter or getting a new online promotion to your client list, the Create Email page is where you’ll go to actually send out your messages. This module doesn't work like traditional email: you won't have an Inbox. It is for mailing out to large numbers of people in a way that is safe.
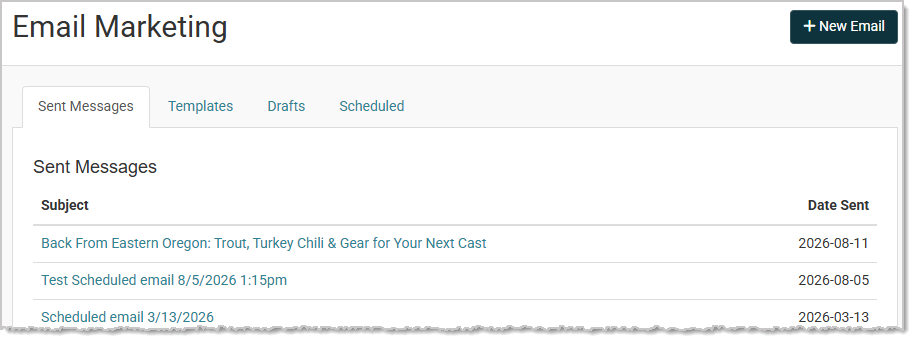
Once you open the Email Module, you will see a list of all Sent Messages you have mailed from the system. You also have tabs on this page for any saved Templates you might have, any Drafts, and for any messages you have Scheduled to go out. In all of these areas, you can click on messages to edit the Subject and Body as needed.
Compose and Send an Email Marketing Message
The Create Email page is where you build, preview, and send marketing emails to your customers. You can write the email yourself or use the AI Assistant to draft it for you.
Building Your Email
To get to this area, in the Marketing menu, go to Email Marketing, and in the upper right, click on the +New Email button. The Create Email page will load for you.
The Create Email page allows you to compose whatever email you might need to send to one or more of your Customer Groups. In our example we'll use an outdoor retailer with a weekly email. On the right side of the page you have an AI Assistant. If you haven't used AI before, you can use this assistant by describing in plain language what you want for your message. We'll give you an example 'prompt' below and the result that the AI Assistant came up with for this message. It can create a time-saving starting message you can adjust and flesh out with details and images, if needed.
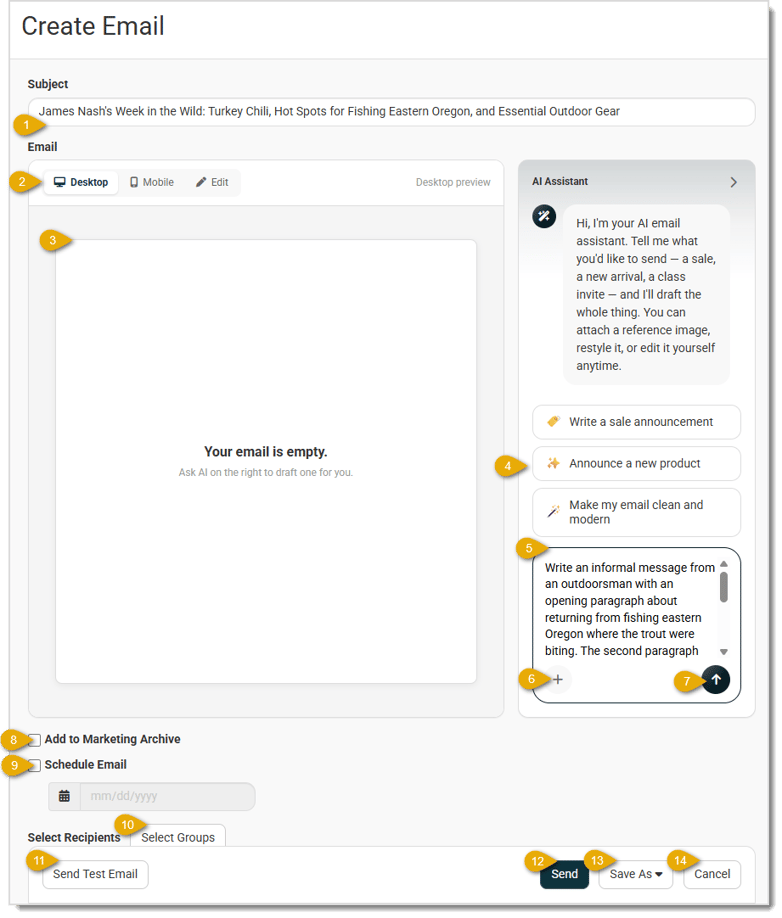
Here are the functions of the Create Email page:
- Subject — Enter a subject line at the top of the page. A subject is required before you can send the email or send a test.
- Email Body — The Email Body preview / editing area has three tabs:
- Desktop — See how the email will look on a full-sized display.
- Mobile — See how the email will display on a phone-sized screen.
- Edit — Switch to a rich-text editor to write or edit the email yourself.
- Preview Window — The preview window will display message content written by your AI Assistant for whichever mode you choose, Desktop or Mobile, or it will display the content editor described below.
- Prompt Shortcuts — The AI Assistant provides some common single-click shortcuts for simple requests for message content. Click one of these to have the AI generate content or clean up what you already have. Please note that in the upper right, if you need to have more space, you can click the Arrow button to hide the AI Assistant panel.
- Prompt Window — Enter your request in plain language, think of it as instructing a marketing copy writer employee in the message you want, in this window. You can enter any amount of text and go to any level of detail you like. The assistant writes both the Subject line and the full email message, then updates the preview immediately. If you have written a Subject, as in our example above, the AI will rewrite it, as in the output shown below. You can keep chatting to refine it: change the tone, restyle it, or ask for specific edits. The assistant automatically pulls in your store's brand color, logo, and website links, so you don't need to specify them.
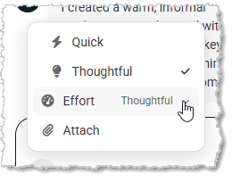
- Prompt Options — Click the Plus icon to open your options list, as pictured below. You can attach up to four images either using the Attach button, which will allow you to browse your device, or you can just drag and drop the image files onto the Prompt Window. You can also specify how involved you want the AI to be by setting its Effort level. By default, it will be in Thoughtful mode, which may take a little longer to produce your message, depending on how much you've written in your prompt. If you choose Quick, the message will be much faster and simpler.
- Submit Button — When you have finished entering your request or update, click the Submit button (Up arrow) and the AI Assistant will begin working on your request. Once it has finished, it will describe what it did for you, as pictured below with our sample prompt.
- Add to Marketing Archive — If you use the Marketing Archive module, which will keep a running list of saved messages you can display on a web page, check this box to add this message to the archive. This is typically used for messages with informational content, such the example with its fishing recommendations and chili recipe.
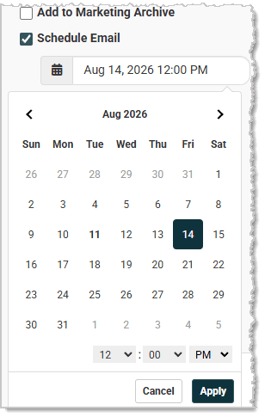
- Schedule Email — If you want to send the email at a future date and time, check the box to Schedule Email. In the Date Picker that opens, select the date you want, then enter the time of day you want to have the system send it. Click the Apply button when you're finished.
- Select Recipients — Click the Select Groups button to choose the group(s) to which you want to send the message. You can create and manage your Groups under the Customers area of the main menu in Customer Groups. Check the boxes for the groups you want, then click the Save Selection button.
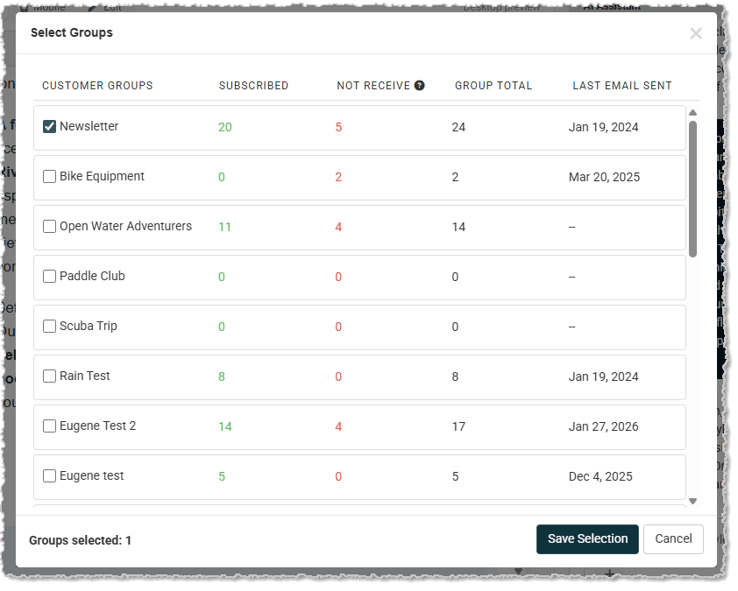
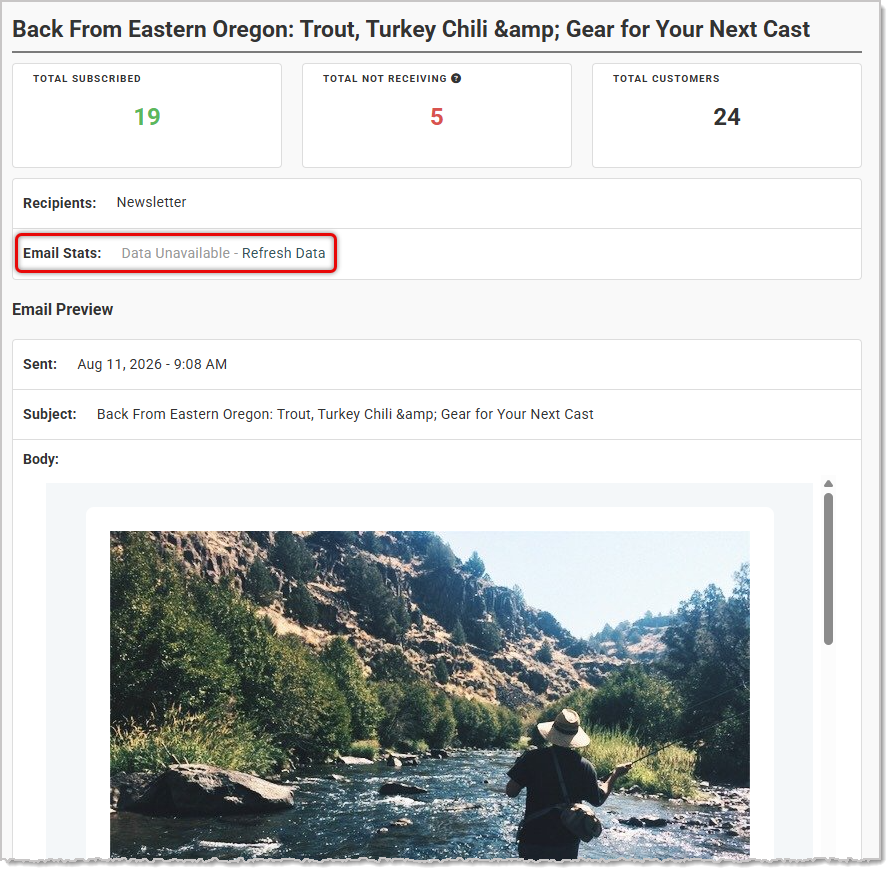
The Select Groups button will display the number of groups you have selected. You will also see Total Subscribed, Total Not Receiving, and Total Customers across all selected Groups, as pictured below.

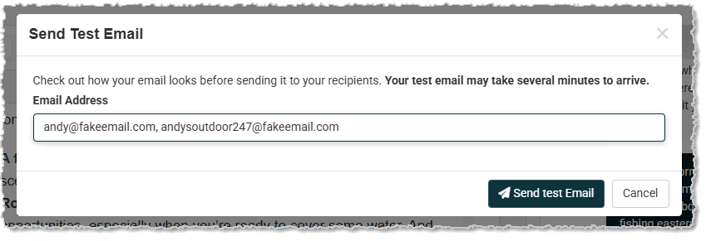
- Send Test Email — If you wish to send a test email to see what your message will look like, click the Send Test Email button. You can enter one or more email addresses, separate them with commas, then click the Send Test Email button.
- Send — When you are done composing your message and configuring the Groups to send it to, if you want to send the message out immediately, click the Send button.
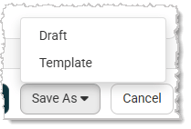
- Save As — If you need to save the message, there are two ways to do so. Click the Save As button and you can either save it as a Draft or as a Template. Draft messages are temporary saves that will remain in your list until you send the message. Templates are permanent saves you can use as a starting Template for future messages. When you click either option, you'll be returned to the Email Marketing page and you'll see your email in the appropriate area (Templates or Drafts tab).
- Cancel — If you decide to leave the page without sending, click the Cancel button. Please note that if you have changes to your message that you haven't saved, they will be lost if you Cancel.
Example Message Composition With AI Assistant
For our example above, we entered the following prompt:
"Write an informal message from an outdoorsman with an opening paragraph about returning from fishing eastern Oregon where the trout were biting. The second paragraph should be a recipe for turkey chili. The third should outline the best fishing spots in eastern Oregon. And the final paragraph should feature wading boots on sale, a new fly-fishing belt pouch, and a waterproof boonie hat that cuts UV.
Here is the result the AI produced after researching the requested elements, note the change to the Subject line:
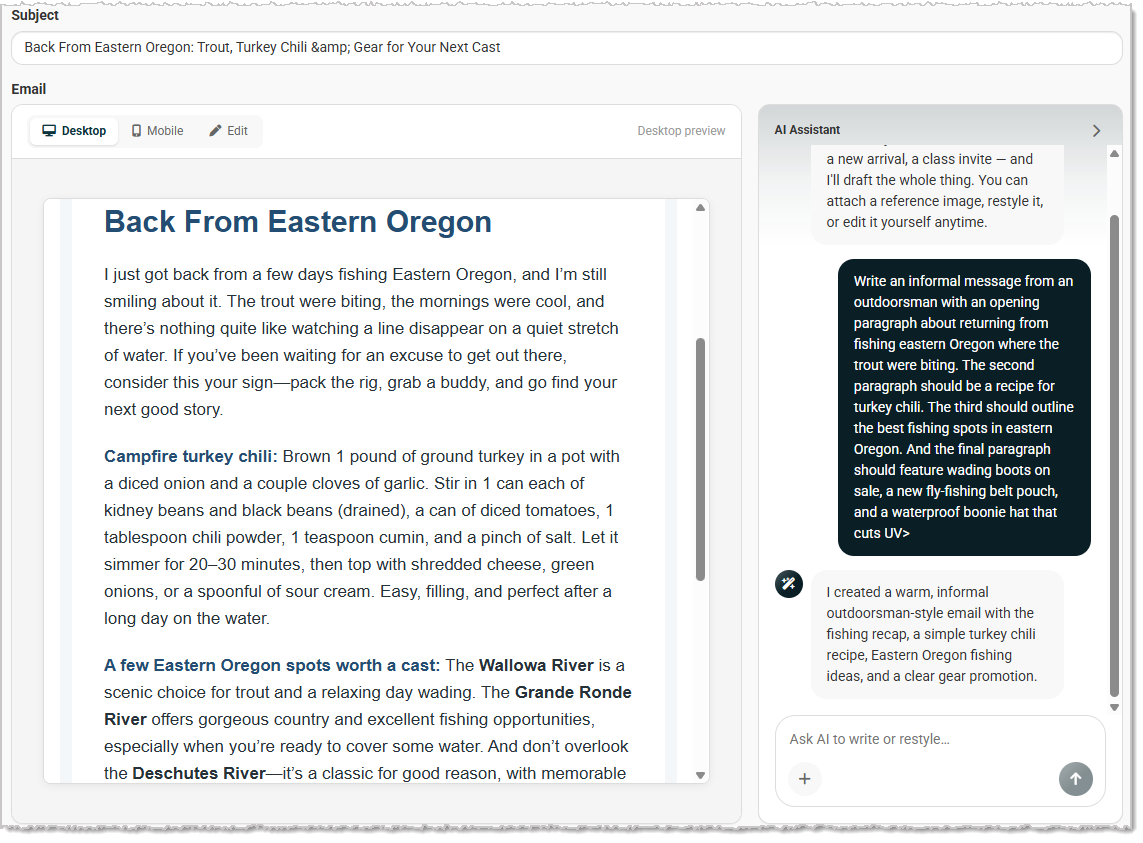
The AI Assistant isn't likely to ever give you exactly what you want, but it will give you a great starting place from which to work, and that will save you time. It's much easier to edit than to compose from scratch, so let the AI do the heavy lifting on the front end, and polish it up with details and your unique brand voice.
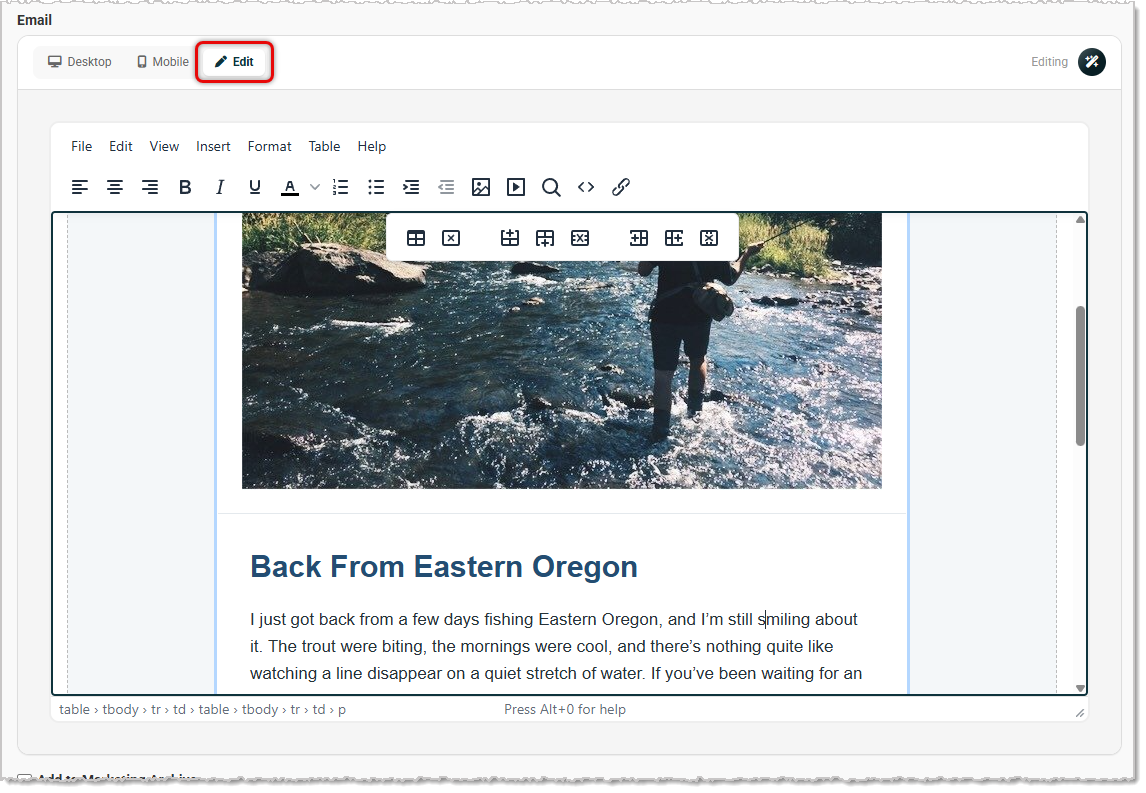
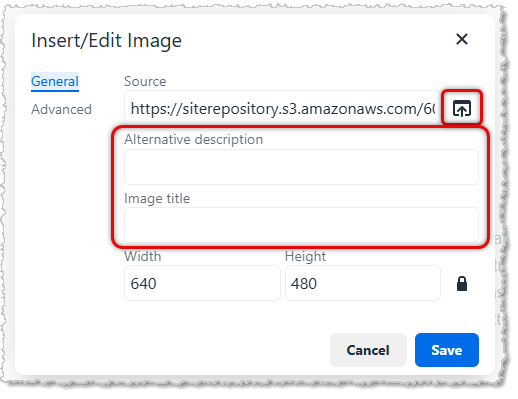
After the AI produces your initial message, you can use the Edit mode to adjust it. The AI will provide a sample image, if none are in your prompt, and you can easily change it using the content editor controls. After clicking the Insert/Edit Image button or using the Insert > Image selection from the menu, the Insert/Edit Image window will open, as pictured below. Click the upload button on the right to upload new images, or to browse for one you have already uploaded to the Files area of Website. For any images you add, you will want to add an Alternative Description and a Title so the search engines can properly index the image and so that sight-challenged visitors can have the image description read to them. Click the Save button to load the image into the message.
Once you have sent your message, the system will report delivery stats for you. To check the stats, in your Sent Messages tab of the Email Marketing page, click on the message you sent. The Email Message page will open showing the recipient Group(s), Email Stats, and an Email Preview. It may take a few hours to start seeing results in the Email Stats area, and you can click to Refresh Data as needed.
Things You Can Do to Improve Email Marketing Delivery Rates
It's a good idea to do some email list maintenance from time to time and trim email addresses from your list for people you know aren't active readers.

Another thing our system does for you is make sure that every message you send out has an unsubscribe link at the bottom, along with your physical address. Email messages sent in bulk that don't have these things are automatically blocked out as spam.
One thing you can do to improve the quality of your mailing list is periodically include requests for your subscribers to add you to their Address Book in their email service. This will make you a safe sender and bypass the spam filters for you.
One more thing you can do for your messages is to make your images more legitimate by including Alternative Text for each one. Alternative Text is used by search engines and spam filters to identify what an image is about, and is designed to display on the screen whenever image download speeds are very slow, so the viewer will know what the image will portray.
Email Marketing Settings
You will need to set up your Email Marketing module to work the way you prefer. You can get to this area by clicking your The Admin Button with your username in the upper right and going to Settings > Website Settings > Email.
Here are the settings you will need to configure:
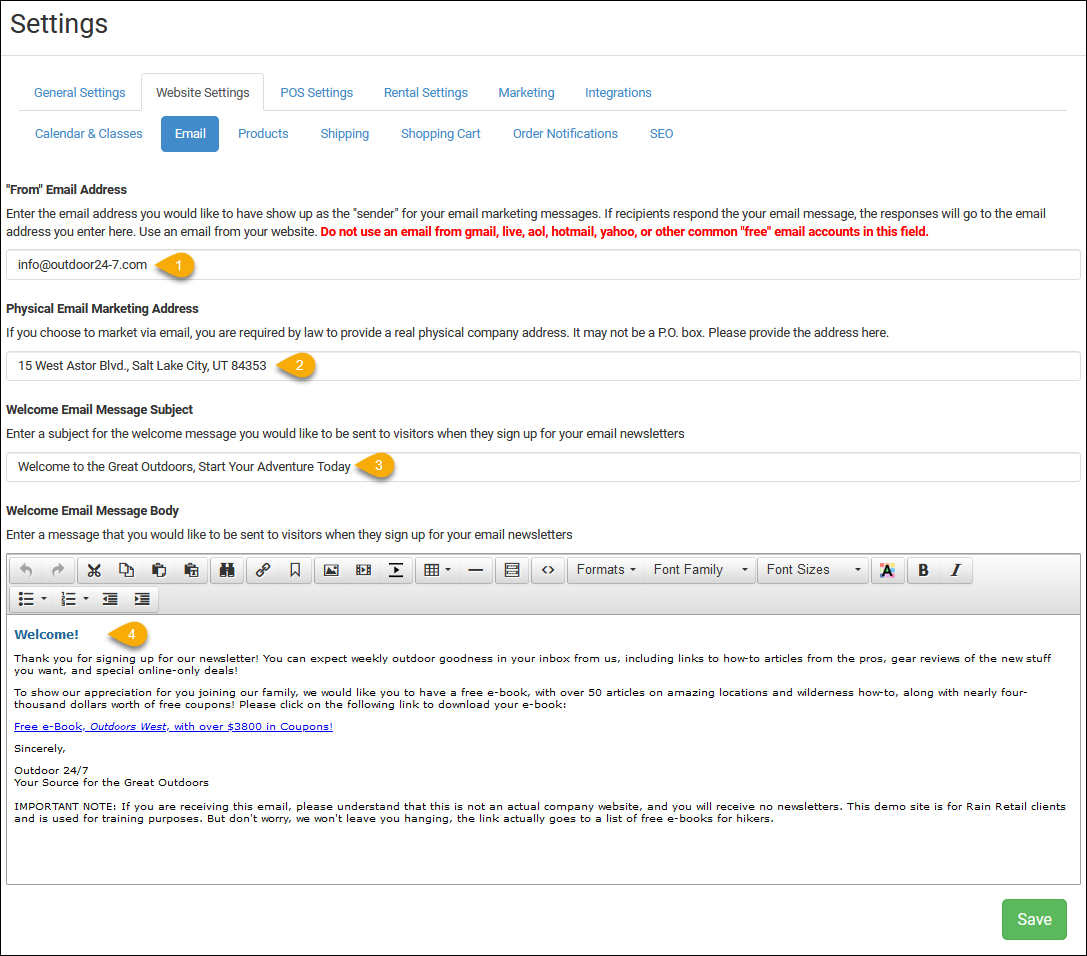
- 'From' Email Address - If you read the warning pictured below, you can see that your 'From' Email Address can't be facilitated by one of the big free email providers such as Gmail, AOL, Yahoo, etc. The reason you can't use one of those providers is that bulk email coming from a free account like that is exactly how online scammers operate, and your messages will be blocked by most all email providers if you did this.
- Physical Email Marketing Address - The CAN-SPAM laws (yeah, not a joke; that's a real, official thing) require that every bulk email message has to have a physical address for the sender listed in the message, along with an unsubscribe link. So the address you enter into this field needs to be a street address and cannot be a PO box.
- Welcome Email Subject - Your Welcome Email is the auto-response email the system will send out every time someone fills out your Newsletter Signup form (see section below on the Newsletter Signup Module). The Welcome Email Subject is the first thing they will see from you, so make sure you word the statement to be a truly warm welcome.
- Welcome Email Message Body - This area is where you have the ability to give your new subscriber some kind of reward for joining up with you. This can take the form of a coupon code you create so they can get a discount on a web order (to learn more about working with Coupons, click here: Coupons), or it can be a link to some kind of download, like the example below (click here to learn how to link to a file: How to Create Links to Pages, Files, and Email Addresses). Your message should let the subscriber know how often they can expect to receive mail from you, and a rough idea of the kind of content you'll be sending.
Please Note: If you will be using a third-party bulk email service such as Constant Contact or MailChimp, you will not need to set up your Welcome Email Message, but you WILL need your 'From' email address and Physical Address entered here since the system will send notifications and other email messages for you. See the section below on how to embed your third-party sign up form on a page in .
Building Your Mailing List: The Newsletter Signup Module
You can take advantage of the traffic that visits your website by offering incentives to sign up, and will help you deliver. If you want to add a Newsletter Signup Module to your site, please follow these steps:
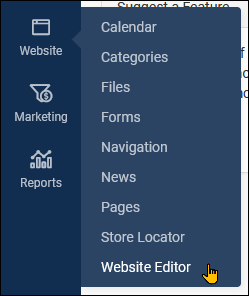
- You will add this module to a page on your website to give your visitors a way to join your mailing list. After logging into the system, click Website on the left and then Website Editor.
- Once you're on the page where you want to add the Signup, at the top of the page, click the +Add Content link.
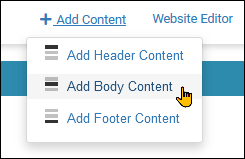
- Most likely, you will want the signup form to be in the main area of the page, so click Add Body Content.
- Scroll down the list of available modules until you see the Newsletter Signup module and click the Add button.
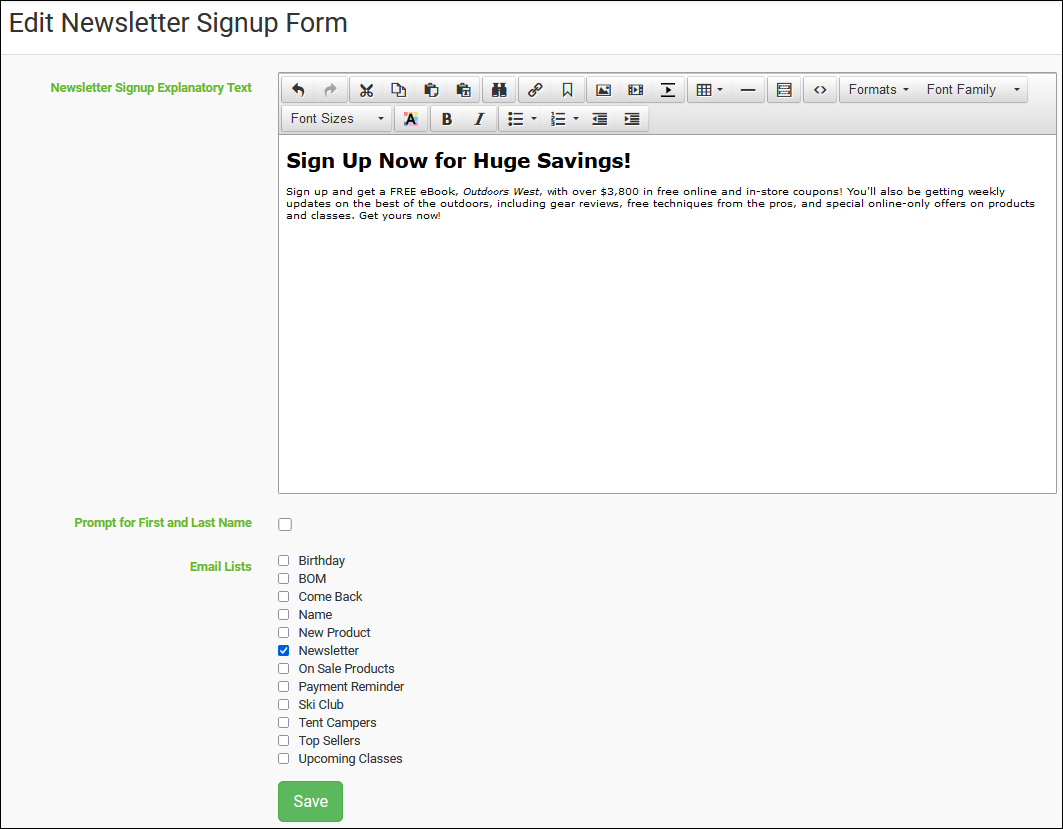
- You will want to change the text to some kind of call to action, ideally with a reward for joining the list. A statement such as, "Join today and get your 20% off coupon for our online store!" is a great way to actually get people to click and join. See how to deliver your freebie above in the Email Marketing Settings section.
- You have the option of requesting First and Last Name in the form, but proceed with care. Statistics consistently show that the more information you require, the fewer people will take the time to fill out your form.
- Be sure to check the box for the Email List to which you want the form to add subscribers.
- Click Save and your form will be at the bottom of the page. You can use the Up arrow on the Module Toolbar to move the module further up the page, if you need.
How to Embed a Third-Party Mailing List Signup Form
If you use a service provider such as Constant Contact or MailChimp, you can directly embed their signup form on your website so your visitors can sign up and their information will go into that account for you. Here are the steps you need to take to embed your form:
- Get Your Signup Form Embed Code - This will vary by provider, but usually you can find your signup form in the Contacts area of the service. Here are some vendor-specific instructions on how to get your embed code (if you don't see your provider, do a Google search for 'How do I get the embed code for my XYZ-Mailing Service signup form?'): Constant Contact, iContact, MailChimp.
- Go to Your Signup Page - Click Website on the left and in the flyout menu, click Website Editor. Go to the page where you want to put your signup form using the Website Pages drop-list in the upper right.
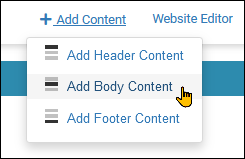
- Add a Content Module - Click the +Add Content link at the top, and in the drop-list that pops up, click on Add Body Content. For the Content module at the top of the list, click the Add button.
- Paste in the Source Code - In the controls at the top of the Content Editor, click the Source Code button and paste what you copied into the window that pops up, then click OK.

- Save and Test - Your signup form may not appear as it should at first, but after you Save the module it should appear as you configured it. Enter an email address and test the form by clicking to Submit, and then go to your bulk email service provider and verify that the email address is now on the proper mailing list.


 October 01, 2024
Is this page helpful?
×Help us improve our articles