Running a Trade-In in the Register

October 01, 2024
Running a Trade-In in the Register
The system allows you to accept a Trade-In item, creating a new product for it if needed, and exchange it for another item in a process that is streamlined to save you time.
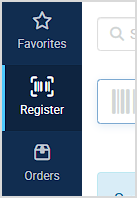
You can process a Trade-In by going to the Register in the upper left.
Processing a Trade-In
- In the Register, load the Customer at the top, or create a new Customer for the person doing the Trade-In.

- Click the Trade In button, as pictured above.
- The New Trade-In panel will pop up on the right and will list the customer's information. If you need to save the customer's Driver License Number, there is a field where you can enter it (if it's already saved, it will be listed automatically). If you need to upload a saved photo of the driver license, you can click the Image Upload button to do so. Please Note: Some state and/or municipal districts do not allow businesses to save images of driver's licenses, so you should check with your Chamber of Commerce to be sure it's okay. You can also add Notes, if needed.
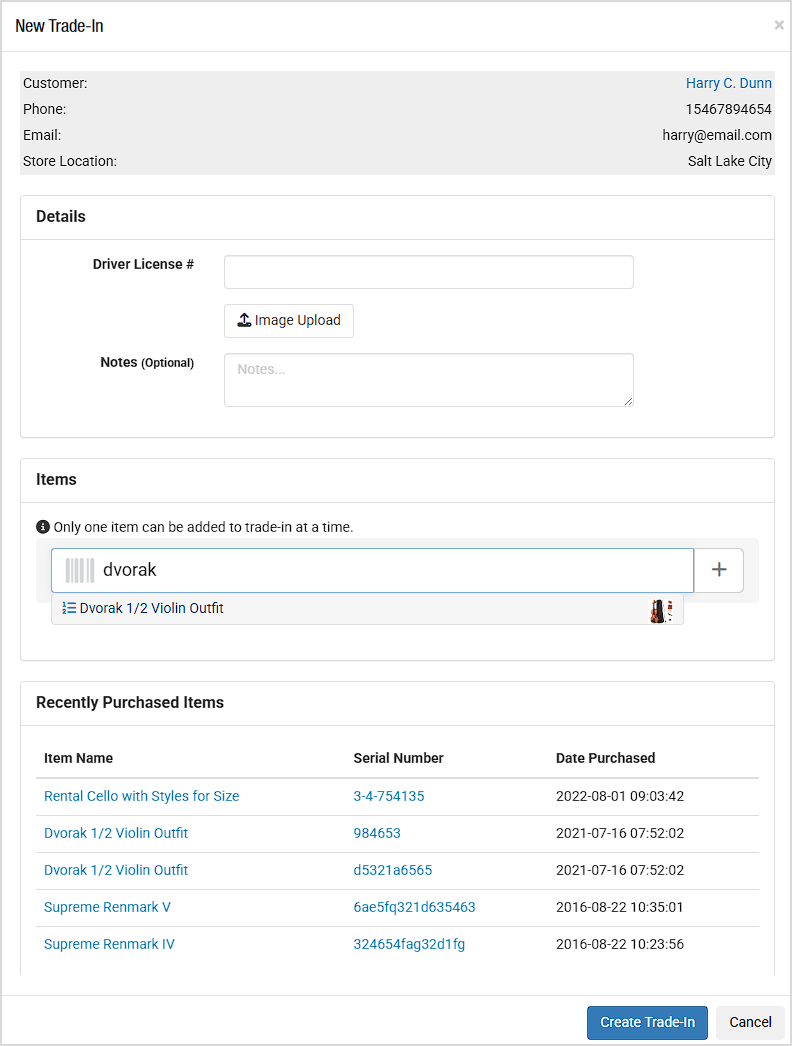
- Add the Item the customer is trading in. You can either search for an existing item, if it is already saved in the system, or you can click the Plus button on the right to create a new product. Only one item can be listed in the New Trade-In panel, so if other items are being traded-in, you will need to reproduce these steps for each one.
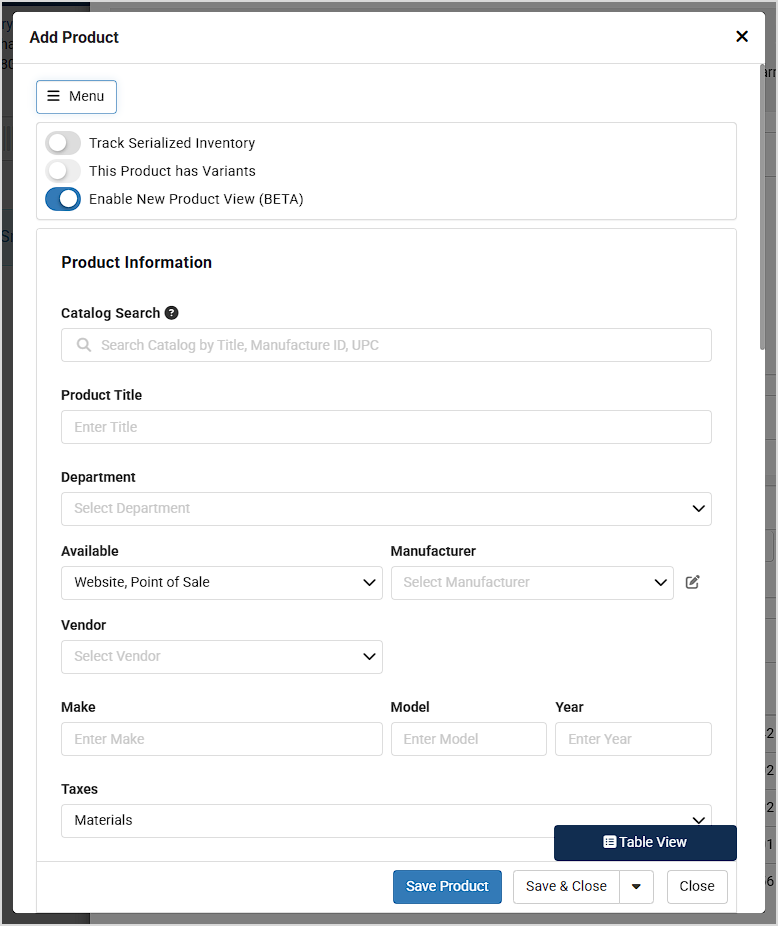
- If you are creating a new product, after you click the Plus button the Add Product window will open where you can add full product details if you want. It is likely you will have time only to add key information. You will need to add a Product Title. If it is a serialized item, toggle Track Serialized Inventory to ON. If you are not yet ready to set the selling Price, you can leave it blank for now. After you complete the Trade-In, you can open the product in the normal way and add full details. Click the Save Product button when you're done.
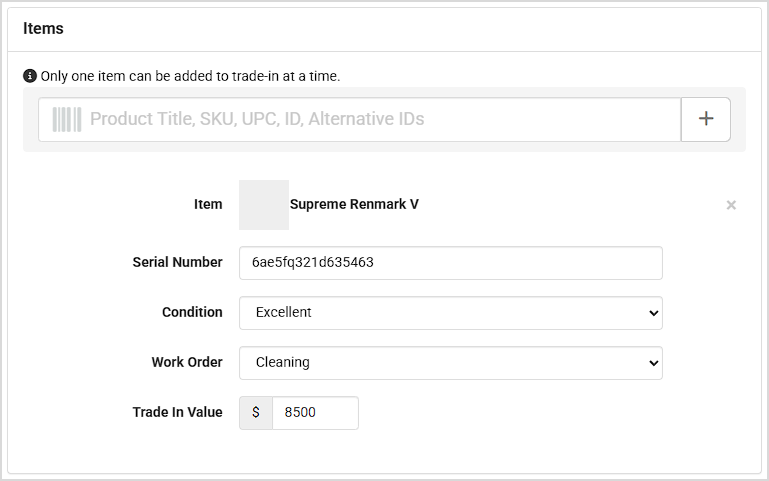
- Once you have the item loaded, you'll see the following options. If the item was already saved in the system with an image, it will display next to the Title. You can enter the Serial Number (for non-serialized items, a Quantity field will display for how many of the items are being traded in). Set the Condition, if appropriate. If you need to start a Work Order for the item, you can select the service it needs from the Work Order drop-list, and once this Trade-In is saved, the Work Order will automatically be created for you. Finally, enter the Trade-In Value you are paying for the item.
- Once everything is in place, click the Create Trade-In button at the bottom, and the Trade-In will load in the Register as pictured below.
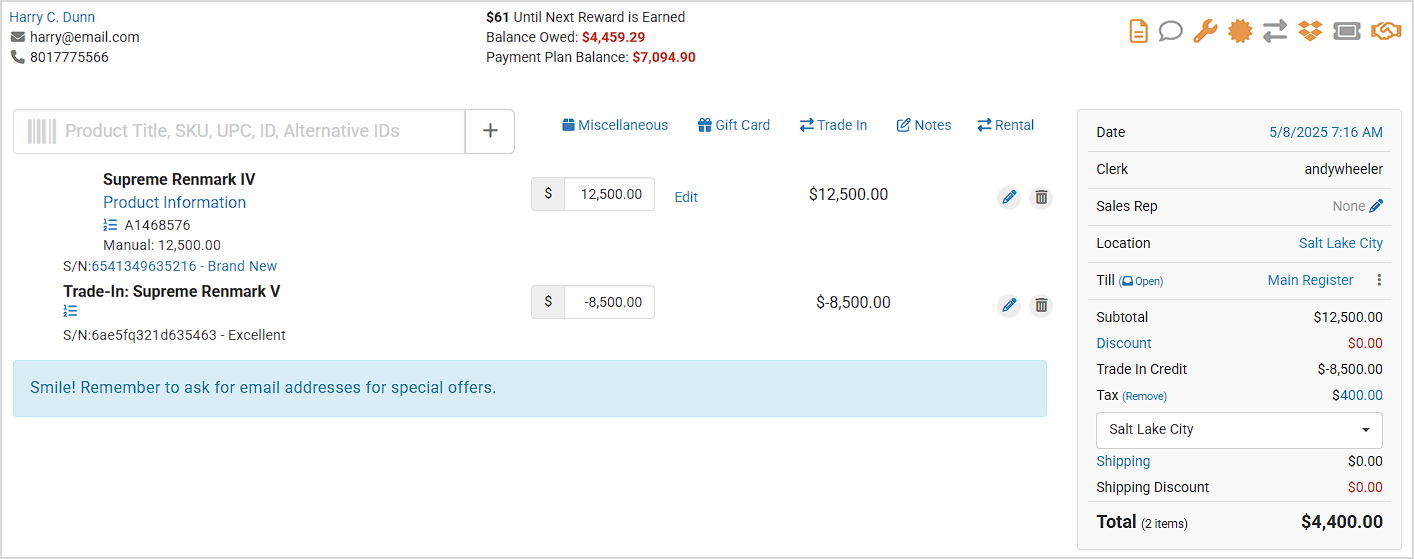
- Add the item the customer is trading for as in the example above. The Register will take into account the trade laws of your state regarding Trade-In Credit and the appropriate Tax that will be applied.
- Complete the transaction in the normal way, either collecting the funds from the customer, or paying out the difference, depending on the value of the Trade-In. Please note that Trade-In Credits are now listed in the End of Day Summary for you.
- Once you are free, go to Inventory > Products, find the new Trade-In product, and click on it to finish adding necessary information and photos.
- If the item needs work, go to Modules > Work Orders and find the Work Order created for the item so you can track your service work on it.
That's it! You're all set
Steps for Applying Discounts in the Register Click the Register icon in the upper left of the blue A
Steps for Completing a Work Order from the Register Click the Register icon in the upper left. Searc
Steps for Creating a Customer in the Register Click the Register Button in the upper left. Click the
Is this page helpful?
×Help us improve our articles